
I posted a photo of our kraut-making process on Instagram this week, and promised to share a simple method for making homemade kraut, suitable for beginners.
While there are countless ways to do this age-old process (and an abundance of veggies you may add to the mix), I’ve kept it intentionally simple to get you started on your fermentation journey with ease.
I’ve extolled the virtues of live-fermented foods many, many times on the blog, so we’ll let the archives do the talking. This post in particular lays out the basics of why eating a variety of probiotic foods daily is important, plus tips for getting your kids in on it without drama, if kraut is a new taste for them.

Making your own fermented veggies is easier than you ever imagined.
All you need is cabbage and salt; a knife and a mason jar. You can get fancier than that, of course, but these are the basics.
To put it simply, making kraut is just slicing, salting, tasting, jarring, and waiting. I’ll break it down into more details below, but that’s honestly all we’re going to do! Don’t be overwhelmed by the number of steps. It’s seriously a 20 minute job.
So let’s get on with it, shall we? The recipe your gut has been waiting for!
A few afflinks follow below. I encourage you to seek these products out locally before buying online. Yay, local economy!
Easy, Homemade Probiotic Sauerkraut Recipe
Make your kraut in any amount you’d like. I suggest beginning with a quart of kraut, or a scant 2 lbs of cabbage.
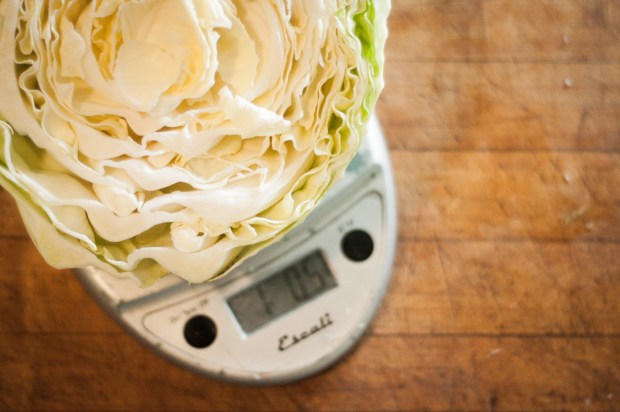
While cabbage weights and sizes vary widely, here’s a general rule: a large cabbage will be somewhere in the 2-3 pound ballpark, while a small cabbage will weigh in around 1/2 pound.
1. Prep your work station.
If your kitchen looks like mine (meaning: well-loved and lived-in and not exactly sanitary), give your work surface a washing or wipe down before you begin. We’re encouraging bacteria in this jar–let’s make sure it’s the good kind.
Gather your supplies: a cabbage or two, some unrefined sea salt, a knife (or mandolin or food processor), and a mason jar.

2. Thinly slice your cabbage.
I used a mandolin for the project pictured, but I often cheat and use a food processor. A chef’s knife works as well, though expect slightly larger pieces of cabbage in your kraut. Each method results in a different texture of finished kraut, so experiment with a few batches to find your favorite method.
Note: Reserve a single large, relatively intact cabbage leaf. We’ll use it later to keep your sliced cabbage below the top of your brine.
Protip: if you, like me, are terrified of your mandolin because you’re afraid you’ll cut your fingertips off, don’t despair! We recently purchase a pair of kevlar gloves for just this purpose, and it’s honestly the best thing ever. No more fiddling with the awkward hand guard, and no more fear of cutting my hand off. Kudos to Alton Brown for the brilliant idea.

3. Add salt.
Transfer your grated or sliced cabbage to a bowl, and add 1 generous tsp of salt for each pound of cabbage.
Gently massage your kraut for 4 to 5 minutes, until it begins to release brine.
If there is one step that I think is important–and often overlooked–it is this one. Massaging the kraut works in the salt, begins to break down the cell walls, and releases the brine. A healthy amount of brine is vital for a good batch of kraut! Once upon a time I did this job with a kraut pounder, but it was loud, clumsy, and not nearly as zen (or effective) as the massaging technique.

Massage until the cabbage becomes soft and liquid begins to pool in the bottom of your bowl. Give a handful a squeeze. You should see liquid dripping into the bowl. Now we’re getting somewhere.
4. Adjust the salt.
Taste-test a pinch of cabbage. It should be salty, but not uncomfortably so. Think more salty than you’d want to eat a whole serving of, but just barely. The salt is critical in keeping your cabbage from spoiling, but too salty and your finished kraut will be unpalatable (we’ll address that below). Err on the side of a pinch too much rather than a pinch too little at the start. Stir in extra salt a pinch (or for a large batch, a 1/2 teaspoonful) at a time until it tastes pleasantly salty.

5. Jar it up.
It’s time to jar your kraut! Using a canning funnel if you have one, fill an appropriately sized wide-mouth canning jar with cabbage. Fill the jar 2/3 full, then press down using your fist or a kraut pounder. Repeat this layering technique until your jar is nearly full and looking really juicy.

When your jar approximately as full as mine shown above, use your fist to press firmly one more time to submerge all the sliced cabbage you can, well below the brine line. This will insure proper fermentation and prevent spoilage during the next few days.

Remember that cabbage leaf that you reserved? After compressing your kraut, gently tuck it inside the top of your jar, using it to hold the grated cabbage below the brine. Tuck in all the bits that stick up (like those show above) using your fingers until everything is held beneath the level of the brine.

6. Top with a weight (optional).
If you have a kraut weight (mine is this type from Masontops), place it in your jar on top of the submerged cabbage leaf. If you don’t have one, you can use a clean flat stone, a tiny 1/4 pint jar tucked inside the neck of your larger jar, or use nothing at all. Just be sure to push as much cabbage as possible beneath the brine level. Anything above this level will spoil and need to be discarded.
Protip: Don’t freak out if some of your cabbage leaf is peeking above the brine. You’ll be discarding it anyway, not eating it, so it’s not the end of the world if a bit of it is exposed. A bit of funky leaf won’t ruin the jar.

7. Lid your jars.
Lid your jar with whatever lid type you have on hand. I have (and love) a couple of silicone Pickle Pipe lids. But I usually have more batches of kraut going than I have fancy lids for, so my solution is to simply lid with a one-piece plastic lid (if I have it) or a regular canning jar lid. I choose the one-piece when possible because, well, they tend to leak, and when you’re making kraut that’s a good thing.
Whether you use use a one-piece or two-piece lid, be sure you don’t crank it on too tightly. Your kraut will produce CO2 and needs to vent a bit. Nobody wants exploding kraut jars in their kitchen.
Protip: If you love making kraut, invest in a set of vented silicone lids. (Our local hardware store sells them, so check locally before you buy online!) They’re worth their weight in gold. I find my kraut is more foolproof and tastes a bit better when I use them.
8. And now, we wait.
Set your jar on a plate in a cool, out-of-the-way place. Since our kitchen is often warm, I normally ferment in the corner of our sewing/dining room! Place them wherever works for you, where you won’t forget about them.

Test your kraut on day three and every other day after that until you are pleased with the flavor. To test, remove the weight and cabbage leaf (using clean hands) then sneak a sample out from below your brine level. Press the kraut back down, and replace the leaf, weight, and lid.
Protip: if your brine level was too close to the top of the jar, it might overflow. Always keep your kraut on a plate to catch any spills! If your kraut gets really lively and bubbly and overflows, then calms down, you may need to press the cabbage back under the liquid or even add a dash of salted water to the top to replace the lost brine. I rarely need to do this if I have packed the kraut down well in step 5.
Sometime between 4 days and 4 weeks, your kraut will be ready to eat! I normally like mine best after 8 to 10 days in summer, 2 to 3 weeks in winter.
Remove the cabbage leaf and the weight, and wipe the rim of your jar. Lid with a one- or two-piece mason jar lid and transfer to the refrigerator. The cold storage will slow the fermentation down to a crawl, and hold your kraut at this perfect, delectable level for months.
Serve with savory meals daily, and celebrate your happy gut flora and better health!
Note: if you finished kraut is too salty, you can pour off a bit of the brine and replace it with water. Fluff the kraut a bit with a fork, then press back down into the jar. Let it sit in the refrigerator for 2 days to allow the salt in the cabbage to reduce. Taste and repeat if needed.
I learned much of what I know from Sandor Katz (Author of several books including my go-to, Wild Fermentation). I’m not crazy about the fermentation recipes in Nourishing Traditions as most of them contain added whey, which makes for slimy (in my experience) ferments and seems unnecessary.
Go forth and ferment all the things!
P.S. Let me know if you’d like a recipe for live-fermented dilly beans, garlic dill pickles, or foraged ferments, too!

Rachel! So good, thank-you. I would appreciate a post on garlic dill pickles.
Thank you so much! I can a lot but have never fermented so am eager to try this. Yes please on the dilly bean recipe. I have them coming out my ears this year!!
I finally made some tonight! I always want to make fermented foods, but feel I lack the ability to commit to them (i.e. check and test every couple of days. Ridiculous reason, I know! But it’s why I’ve given up on kombucha and switched over to swichel!). My plan is to hopefully make the fermented salsa recipe this weekend, that you had posted last year on the old blog site. That’s been on my mind since then and I want to try it with the last of my tomatoes!