Another pre-release from the Unplugged Family Activity Book? You bet! Since lilacs are bursting for many right now, it felt like the perfect time for this simple, delicious, springtime recipe.
Before we dive in with the download, I have a few quick thoughts to share…
Just a month from today, my new book will land in the welcoming world. And all things considered, I’d say that just about perfect timing. Don’t you think?
As so many children and their families and trying to regain their equilibrium from an unprecedented end to the school year, we are all entering a summer that will be equally disorienting. Many of our usual summer activities–from camp to summer school, community potlucks to swimming at the local pool–are off the table for so many of us.
If you pre-ordered, in just four short weeks, The Unplugged Family Activity Book will land on your doorstep, and you’ll be off on a grand adventure all summer (and all year!) long. And I can hardly wait to hear which project, recipe, or celebration you try first.
Will it be bark boats or infused honey? Campfire bread or giant bubbles? A backyard tea party or a backyard campout? There are so many simple, free activities to enjoy within these pages, I can’t wait to see where you dive in.
In the meantime, can I ask a small favor of you?
Because I could truly use your help. Below are five small, but powerful things you can do to help support me during this launch. And aside from pre-ordering your family’s copy, none of them will cost you a dime.
1. Pre-Order The Unplugged Family Activity Book
You can pick up a copy for yourself, your family, or a friend directly from me, or through your local bookshop. (Bookshop.orgis another great resource that many local, independent bookstores are using in order to stay afloat right now. Usemy local bookstore’s portal, or search for your own!)
2. Contact your library
Drop an email to your local library, requesting they pick up a copy for their shelves. It’s a perfect resource for what will surely prove to be a DIY-fun sort of summer season.
3. Tell your friends!
Word-of-mouth is everything, so talk it up. I can’t express enough how important this one is. Use social media, email, or a good old-fashioned phone call. Whatever your strategy, I appreciate each and every recommendation.
4. Post a review
After your copy arrives, post a review online. Goodreads and Amazon are both excellent places to generate some positive buzz that helps other families know better what to expect within the pages. Along with sharing with your friends, reviews are profoundly helpful for the longtime trajectory of any book.
5. Go outside and play!
Then get out there and enjoy all 60+ ideas, projects, recipes, and celebrations. And savor this season. If you share photographs online, use #unpluggedfamilyactivitiybook to share your adventures and creations.
Thanks, friends. It means so much to have your support along this road.
And now… the recipe you’ve been waiting for! Find your download in the link below. Enjoy.
There are so many things that our great-grandparents knew how to do that we as a culture no longer remember. Things like how to can soup, bake bread, craft a poultice, split firewood, butcher a hen, or make kraut (off the top of my head).
Somewhere along the way, we traded our collective domestic wisdom for the lure of convenience. And what a loss that truly was! To our families, our health, our budgets, and the earth.
I say it’s time to bring that knowledge back.
One person, one family, one step-outside-of-your-comfort-zone at a time, let’s start to remember. We can regain what was lost, and take back some of the simple skills that have been commoditized in our modern world.
When I posted a photo on Instagram and Facebook last week of a batch of cabbage kraut in the making, I didn’t anticipate such a flurry of earnest questions regarding procedure, safety, equipment, and more:
“Do you have any advice for someone new to fermenting? I am honestly so terrified of doing it ‘wrong’ and making my family sick…growing up in the era of all-bacteria-in-food-is-potentially-deadly. Natural mold=bad. Bubbly ferments=good. Hard to wrap my head around how it all works and when good ferments can lead to poison for our bodies…and how to know a bad ferment. […] I need to get over this hurdle of fear!”
“Inspired to finally try this, as i keep feeling the tug of ‘what if it doesn’t turn out?’ holding me back.”
“I’ve been wishing I had the bravery to try to make my own recently… but I get scared about not knowing if it’s spoiled on the counter while it’s curing… and do I need those glass weights or special water or other gear?”
The questions above really to to the heart of the matter, don’t they? Without learning these skills from our ancestors, they became cloaked in mystery, anxiety, and fear–and we fret that if we do it wrong we’re sure to kill someone.
Let me assuage your fears.
Sandor Katz, my live fermentation hero (whose books I reference below), said at a recent talk that he’s never heard of anyone dying–ever–from fermented foods. Yes, he’s made bad ferments that he’s spat out before, but no, he’s never gotten sick, nor has anyone he knows. I’m going to back him up here.
Because it’s all about the science.
Lactofermentation (or live-fermentation) uses the naturally occurring good bacteria (Lactobacillus) found in raw veggies to preserve. The bad bacteria (the kind that could make you sick and/or poison your peeps) can’t handle the salt, and so are killed in the kraut-making process.
This is why you won’t give anyone food poisoning with your ferment. Because it’s, well, fermented.
In short, it works like this: We salt our veggies which kills the bad bacteria; then the good bacteria have a party to celebrate. Bubbles form in your ferment, the brine rises up and out of your jar, and everyone is happy. (Sour, but happy.) It’s nearly fool-proof.
Best of all, it doesn’t take any special equipment. You don’t need weights and silicone lids; pickle crocks or razor-sharp mandolines. While in years past I’ve used all of these gadgets and more, you really don’t need them, and I’ve come full-circle, back to the basics. Knife, jar, plate.
And I realized this week that after nearly 10 years of blogging and kraut-making, I have given you a proper sauerkraut tutorial! Forgive me.
So I made another batch, photographing and documenting every step of the way. Think of me as your virtual, younger than I should be great-grandmother. Or something. And with a bit of courage and knife work from you, you can join me here in the simple, sustainable, health-giving act of making your own sauerkraut.
Ready? Let’s get our kraut on.
Lacto-fermented Sauerkraut Tutorial & Recipe
Ingredients
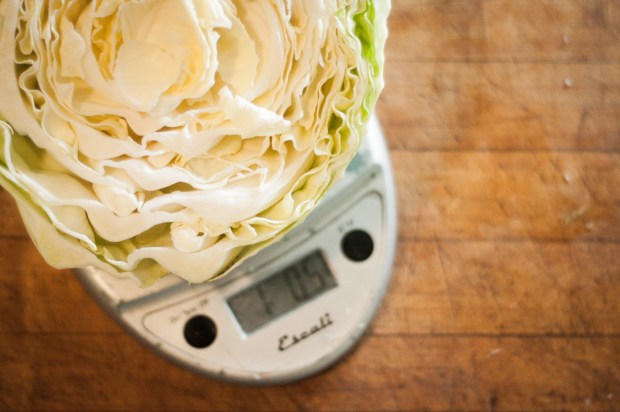
1 cabbage, approximately 2 lbs.
1 tbsp good quality sea salt
Supplies
Sharp knife
Mixing bowl
Screw-top mason jar with a tight fitting lid
plate or bowl with an adequate diameter to hold your jar
Instructions
1. Peel the shabby, outer leaves off of your cabbage and compost them.
2. Peel off a full-sized, not-so-shabby cabbage leaf. Do not slice, but set aside whole.
3. Cut your cabbage in nearly in half, slicing at an angle just beside the core. Repeat on the other side, creating a wedge with the core in the center. Cut off the edges of the wedge that aren’t core. Don’t fiddle with it too much, just whack off the excess.
Set the core aside for use in a bit.
4. Grab your sharp knife (or, if you prefer, a box grater or electric food processor), and thinly slice your cabbage. My method is to cut the cabbage halves into wedges that are approximately 2″ across, then slice the 2″ chunks as thinly as you wish, as pictured. Continue slicing until your whole cabbage is in thin shreds.
5. Using your box grater, grate the core beginning with the inside, and holding onto the stem. Grate just until where it stops looking appealing, then discard the stem end.
If everything went according to plan, your bowl should look something like this:
Your pile of sliced and grated cabbage may be smaller than mine, as I was working with 3 cabbages instead of just 1, but honestly, do whatever size batch you wish. (When we were recently traveling, I made tiny 1/4 to 1/2 cabbage-sized batches in an empty peanut butter jar, just big enough to fit in the cooler.)
6. Now it’s time for the magic. Add approximately 1 tbsp. of high quality sea salt for every 2 lbs. of cabbage you used. (An average smallish/medium cabbage normally runs around that size.) Sprinkle the salt over the grated and sliced cabbage, and stir to combine with your hands. Give it a little massage to work some salt into the cabbage. Work it for just a minute or two, until thoroughly combined.
7. (And this is the hard one…) Walk away.
Really. Walk away. You can go and grab your grandma’s kraut pounder (like the one pictured above), and expend 1,200 calories beating those vegetables into juicy submission, or you could just… walk away. I suggest the latter, and only pulled out my kraut pounder to tell you you don’t need one.
Come back in 10 to 20 minutes, and see what you’ve got.
8. Rewash your hands, and head back to your kraut bowl. If the salt has already started working on the cabbage, the veggies will have a slightly translucent appearance, and feel a bit wet. That’s a good sign! Use your hands to gently massage the kraut, further softening the vegetable and breaking down the cell walls. Do this for as long as you want (1 minute, 5 minutes, it honestly doesn’t matter), then walk away again, giving it another 5 to 15 minutes to continue to release its juices and soften.
When you return, your cabbage should have started to release even more liquid. Using clean hands, stir it well, then grab a handful and give it a squeeze. If your cabbage was really fresh, you’ll probably have brine running down your elbows.
If your cabbage wasn’t as fresh and juicy, repeat step 8 one or two more times.
9. Taste the brine. It should be nice and salty, but not like licking a salt lamp. If you still have very little brine and tastes like cabbagy water with little or no salty flavor, add more salt. If it’s unpleasantly salty and has you running for the sink to rinse your tongue, you can add 1/2 c of water, stir, and taste again.
10. Let’s review. You’ve chopped up your cabbage, given it a relaxing salt massage, and now you’re swimming in soft, briney cabbage. Great! Now it’s time to pack it in a jar for fermenting.
Most average sized cabbages will make around a quart of kraut, I made a gallon using 3 large cabbages. Using your (clean) hands, a widemouth canning jar, and canning funnel (if you have one), place a couple of handfuls of cabbage in the jar. if your hands fit in jar, make a fist and press the kraut firmly in, using your knuckles. (If your hand doesn’t fit, use a sturdy spoon to mush it in there as best as you can.)
11. Keep filling and pressing, filling and pressing, until the jar is full to the shoulders or and your cabbage is all used up. At first you won’t see any brine at all, but as you add more layers and press in the veggies, the brine will begin to release. By the time you’ve loaded your jar, you should be left with a bowl with brine pooled in the bottom. Pour this over the cabbage now.
Your jar should look something like this: cabbage firmly packed at the bottom, topped with juicy brine. (If you don’t have this much brine, taste again to make sure it’s plenty salty and add more salt if needed stir it a bit with a fork, press again, and/or wait another 20 minutes or so. It will release more. I promise!)
12. Remember that reserved cabbage leaf? Go and get it. Press the leaf into the top of the jar, holding your cabbage beneath the brine, and preventing oxygen from getting to your kraut and making it taste less amazing. Tuck the leaf around the edges, pushing until it stays beneath the brine as well. (Anything above the brine can develop mold, but it will not effect the kraut beneath the brine. Just remove and discard if this happens and all will be well. Really! Because: science.)
Use your fingers to swipe around the neck of the jar to remove any cabbage bits you may have missed.
13. Add additional brine if needed to fill your jar right to the neck, so that it looks something like the picture below (adding approximately 1/2 cup of water to 1 tsp of salt).
14. Tightly lid your jar with a regular canning jar lid, and set on a rimmed plate or bowl in a cool, out-of-the-way corner of your kitchen, out of direct sunlight.
After 1 to 3 days, your brine will rise up and out of the jar (thus the plate or bowl)!
Edited to clarify: as long as you are “burping” your jar after day 3, and daily going forward, the jar should not build up enough pressure to break. A friend who makes kraut professionally told me that she has never had a jar break using this method, and I concur. Though you’re tightly sealing it, it’s not pressure-canner tight, so a drizzle of brine will be able to seep up and out by the pressure generated from fermentation. For this reason, I don’t recommend fermenting in latch lid jars, as they seal up too tightly and don’t let any air escape, causing a breakage risk.
If you’re concerned about breakage, simply “burp” your jar daily from the start by loosening, then retightening the lid.
Pour off any liquid that pools on the plate, and wipe down the jar if desired.
15. After four or five days, it’s time for a taste! Using clean hands, remove the lid and cabbage leaf, and set aside on a clean plate. Scoop out a bite of kraut on a fork, and taste. It should be just beginning to taste sour, and the cabbage will be softer than when you jarred it up.
Unless your kitchen is quite warm, your kraut won’t be ready for a few more days, but I think daily tasting to get a feel for how it changes it’s a great habit to get into. Consider it kraut-bonding.
After each taste test, press the kraut back under the brine with clean hands, and top with your cabbage leaf. Double check that everything is below the bring before twisting on the lid.
16. When you are pleased with the taste (normally after 1 to 2 weeks, depending on your flavor preference and the temperature of your kitchen), pop it into the fridge. You can remove the cabbage leaf and compost it at this stage, then push the kraut beneath the brine. Serve with every meal, and be sure to push the kraut back under the brine after each serving.
Look at you, making your own kraut!
Your great grandma would be proud.
P.S. There are a thousand ways you can embellish your next batch of kraut once you’ve mastered making a basic batch. Add a some caraway seeds, a teaspoon of dill, or some thinly sliced hot peppers. Throw in sesame seeds and kelp, or an assortment of other grated veggies.
The sky’s the limit, and–aside from adding salt and keeping the veggies beneath the brine–there are no rules.
P.P.S. Want a book on the subject? Here are a few of my faves. Buy them at your local bookshop! (If you choose to buy online, some afflinks are below.)
I posted a photo of our kraut-making process on Instagram this week, and promised to share a simple method for making homemade kraut, suitable for beginners.
While there are countless ways to do this age-old process (and an abundance of veggies you may add to the mix), I’ve kept it intentionally simple to get you started on your fermentation journey with ease.
I’ve extolled the virtues of live-fermented foods many, many times on the blog, so we’ll let the archives do the talking. This post in particular lays out the basics of why eating a variety of probiotic foods daily is important, plus tips for getting your kids in on it without drama, if kraut is a new taste for them.
Making your own fermented veggies is easier than you ever imagined.
All you need is cabbage and salt; a knife and a mason jar. You can get fancier than that, of course, but these are the basics.
To put it simply, making kraut is just slicing, salting, tasting, jarring, and waiting. I’ll break it down into more details below, but that’s honestly all we’re going to do! Don’t be overwhelmed by the number of steps. It’s seriously a 20 minute job.
So let’s get on with it, shall we? The recipe your gut has been waiting for!
A few afflinks follow below. I encourage you to seek these products out locally before buying online. Yay, local economy!
Easy, Homemade Probiotic Sauerkraut Recipe
Make your kraut in any amount you’d like. I suggest beginning with a quart of kraut, or a scant 2 lbs of cabbage.
While cabbage weights and sizes vary widely, here’s a general rule: a large cabbage will be somewhere in the 2-3 pound ballpark, while a small cabbage will weigh in around 1/2 pound.
1. Prep your work station.
If your kitchen looks like mine (meaning: well-loved and lived-in and not exactly sanitary), give your work surface a washing or wipe down before you begin. We’re encouraging bacteria in this jar–let’s make sure it’s the good kind.
Gather your supplies: a cabbage or two, some unrefined sea salt, a knife (or mandolin or food processor), and a mason jar.
2. Thinly slice your cabbage.
I used a mandolin for the project pictured, but I often cheat and use a food processor. A chef’s knife works as well, though expect slightly larger pieces of cabbage in your kraut. Each method results in a different texture of finished kraut, so experiment with a few batches to find your favorite method.
Note: Reserve a single large, relatively intact cabbage leaf. We’ll use it later to keep your sliced cabbage below the top of your brine.
Protip: if you, like me, are terrified of your mandolin because you’re afraid you’ll cut your fingertips off, don’t despair! We recently purchase a pair of kevlar gloves for just this purpose, and it’s honestly the best thing ever. No more fiddling with the awkward hand guard, and no more fear of cutting my hand off. Kudos to Alton Brown for the brilliant idea.
3. Add salt.
Transfer your grated or sliced cabbage to a bowl, and add 1 generous tsp of salt for each pound of cabbage.
Gently massage your kraut for 4 to 5 minutes, until it begins to release brine.
If there is one step that I think is important–and often overlooked–it is this one. Massaging the kraut works in the salt, begins to break down the cell walls, and releases the brine. A healthy amount of brine is vital for a good batch of kraut! Once upon a time I did this job with a kraut pounder, but it was loud, clumsy, and not nearly as zen (or effective) as the massaging technique.
Massage until the cabbage becomes soft and liquid begins to pool in the bottom of your bowl. Give a handful a squeeze. You should see liquid dripping into the bowl. Now we’re getting somewhere.
4. Adjust the salt.
Taste-test a pinch of cabbage. It should be salty, but not uncomfortably so. Think more salty than you’d want to eat a whole serving of, but just barely. The salt is critical in keeping your cabbage from spoiling, but too salty and your finished kraut will be unpalatable (we’ll address that below). Err on the side of a pinch too much rather than a pinch too little at the start. Stir in extra salt a pinch (or for a large batch, a 1/2 teaspoonful) at a time until it tastes pleasantly salty.
5. Jar it up.
It’s time to jar your kraut! Using a canning funnel if you have one, fill an appropriately sized wide-mouth canning jar with cabbage. Fill the jar 2/3 full, then press down using your fist or a kraut pounder. Repeat this layering technique until your jar is nearly full and looking really juicy.
When your jar approximately as full as mine shown above, use your fist to press firmly one more time to submerge all the sliced cabbage you can, well below the brine line. This will insure proper fermentation and prevent spoilage during the next few days.
Remember that cabbage leaf that you reserved? After compressing your kraut, gently tuck it inside the top of your jar, using it to hold the grated cabbage below the brine. Tuck in all the bits that stick up (like those show above) using your fingers until everything is held beneath the level of the brine.
6. Top with a weight (optional).
If you have a kraut weight (mine is this type from Masontops), place it in your jar on top of the submerged cabbage leaf. If you don’t have one, you can use a clean flat stone, a tiny 1/4 pint jar tucked inside the neck of your larger jar, or use nothing at all. Just be sure to push as much cabbage as possible beneath the brine level. Anything above this level will spoil and need to be discarded.
Protip: Don’t freak out if some of your cabbage leaf is peeking above the brine. You’ll be discarding it anyway, not eating it, so it’s not the end of the world if a bit of it is exposed. A bit of funky leaf won’t ruin the jar.
7. Lid your jars.
Lid your jar with whatever lid type you have on hand. I have (and love) a couple of silicone Pickle Pipe lids. But I usually have more batches of kraut going than I have fancy lids for, so my solution is to simply lid with a one-piece plastic lid (if I have it) or a regular canning jar lid. I choose the one-piece when possible because, well, they tend to leak, and when you’re making kraut that’s a good thing.
Whether you use use a one-piece or two-piece lid, be sure you don’t crank it on too tightly. Your kraut will produce CO2 and needs to vent a bit. Nobody wants exploding kraut jars in their kitchen.
Protip: If you love making kraut, invest in a set of vented silicone lids. (Our local hardware store sells them, so check locally before you buy online!) They’re worth their weight in gold. I find my kraut is more foolproof and tastes a bit better when I use them.
8. And now, we wait.
Set your jar on a plate in a cool, out-of-the-way place. Since our kitchen is often warm, I normally ferment in the corner of our sewing/dining room! Place them wherever works for you, where you won’t forget about them.
Test your kraut on day three and every other day after that until you are pleased with the flavor. To test, remove the weight and cabbage leaf (using clean hands) then sneak a sample out from below your brine level. Press the kraut back down, and replace the leaf, weight, and lid.
Protip: if your brine level was too close to the top of the jar, it might overflow. Always keep your kraut on a plate to catch any spills! If your kraut gets really lively and bubbly and overflows, then calms down, you may need to press the cabbage back under the liquid or even add a dash of salted water to the top to replace the lost brine. I rarely need to do this if I have packed the kraut down well in step 5.
Sometime between 4 days and 4 weeks, your kraut will be ready to eat! I normally like mine best after 8 to 10 days in summer, 2 to 3 weeks in winter.
Remove the cabbage leaf and the weight, and wipe the rim of your jar. Lid with a one- or two-piece mason jar lid and transfer to the refrigerator. The cold storage will slow the fermentation down to a crawl, and hold your kraut at this perfect, delectable level for months.
Serve with savory meals daily, and celebrate your happy gut flora and better health!
Note: if you finished kraut is too salty, you can pour off a bit of the brine and replace it with water. Fluff the kraut a bit with a fork, then press back down into the jar. Let it sit in the refrigerator for 2 days to allow the salt in the cabbage to reduce. Taste and repeat if needed.
I learned much of what I know from Sandor Katz (Author of several books including my go-to, Wild Fermentation). I’m not crazy about the fermentation recipes in Nourishing Traditions as most of them contain added whey, which makes for slimy (in my experience) ferments and seems unnecessary.
Go forth and ferment all the things!
P.S. Let me know if you’d like a recipe for live-fermented dilly beans, garlic dill pickles, or foraged ferments, too!
If you asked me what our family's most important, most healing, most nourishing food is I would answer without hesitation. Bone broth.
Rich, long-simmered, nutrient-rich bone broth.
I make a batch weekly and we drink it by the mug-full, cook vegetables or meat in it, and transform it into soups and stews once or twice a week.
Made with kitchen scraps and bones of any sort, we strive to eat a serious amount of this every week. When we're sick or wrestling with tooth decay or food sensitivities we up the quantity to 1 quart per day for adults and 1 pint per day for kids. That's a lot of broth!
And sometimes it's nice to make a huge batch and tuck it away for late use. Normally I freeze stock in quarts but taking most of a day to thaw a jar of stock requires forethought that I don't always have.
Plus I'm a master at breaking jars with this method, so. You know. Running low on jars after a while.
Enter the pressure canner.
Pressure canning stock is the easiest way to get started with your pressure canner. It's a no-brainer of a formula, and if you're nervous about using your pressure canner it's the idea first batch.
It took me a while to build my courage for this kitchen experiment, but after I got a friend hooked on broth she returned the favor by getting me hooked on pressure canning it. It was easier than I thought, and the luxury of not having to thaw broth every two days? It's genius.
Ready to give it a go? Here's how.
First, let's make some stock.
What kind? That's entirely up to you. Fish, chicken, lamb, beef, venison – anything goes!
While the jars in the photos below are lamb stock, chicken is even more common around here.
Basic Bone Broth Recipe
It's so. Darn. Easy. And delicious. (Really!) Here's how to make 1/2 gallon or more in four easy steps.
1. Save any bones from your weekly meals in a bag in the freezer. Fish, chicken, turkey, duck, beef, venison, lamb, beef… you get the idea. You can also purchase bones inexpensively at your local grocery or coop. Throughout the week add any carrot and celery trims, onion ends and peels, and garlic trims to the bag.
2. On stock making day transfer your bag of bones and vegetable scraps to a slow cooker or large soup pot or your Instant Pot (my new favorite method. That variation is below. Add an extra head of garlic cut in half across the cloves (don't bother peeling or separating cloves) and a small onion or carrot if your veggie scraps aren't abundant. No need to chop or peel anything. Just toss them in whole.
How many bones and how much vegetables should you add? It's adaptable. For chicken stock aim for one chicken carcass, one medium onion, one celery stalk and one medium carrot as a good place to start for an average (8-12 quart) stock pot.
Add twelve peppercorns, one bay leaf and (optional) one 2" knob of ginger root, cut in half and smashed with the blunt end of a knife.
3. Cover everything with water and add 2 Tb apple cider vinegar. The vinegar is important. It helps extract the minerals for the bones into the broth, which it what we're after. Set aside for one hour while the vinegar starts to work it's way into the bones.
4. Bring to a gentle boil, reduce to a simmer, and cook covered on very low heat. Leave on low heat for 24 hours for small bones (chicken and fish) and 48 hours or more for large (cut beef, lamb, or venison bones). Add water as needed. You can begin drawing off your stock and replacing what you take with water after just six hours. But the longer you simmer the more mineral rich your broth will be.
Instant Pot Variation
If you're making your stock in the Instant Pot simply follow the instructions above but place everything in your IP.
Fill with water to 2" below the maximum fill line.
Set your Instant Pot to manual and adjust timer for 120 minutes. (For beef or other large bones you can choose to run for a second 120 minute cycle. Or not. It's up to you.) After your broth is done open the instant pot, cool slightly, then strain.
If you're feeling super frugal you can use the same bones and vegetables but add a second batch of water and run again as above!
Now it's time to can!
Fill your quart or pint jars to within 1" of the rim. Dip a cotton cloth or paper towel in white vinegar and wipe the rim of your jars. This will ensure a clean rim and a good seal. You can also use water but I'm partial to the vinegar trick.
Put your lids in a pot of just boiled water to soften the rings. (If you are buying new lids this season check the box label. The newest BPA-free lids on the market you skip this step for.)
Top your jars with lids and screw on rings "finger tight". (If you are unsure how tight that is simply tighten the rings fully, the loosen approximately 1/2".
Meanwhile, heat approximately 3" – 4" of water in your pressure canner. (Unlike a water bath canner you don't submerge your jars fully in a pressure canner. The steam pressure does the work this time, not the simmering water.) Add a splash of vinegar if you have hard water to prevent minerals from coating the outside of your jars.
When your jars are full and lidded and the canner is simmering, it's time to load up! Affix the lid on your canner but don't engage your weight yet.
Watch your canner. When a plume of steam escapes from the valve set a timer for 10 minutes. Keep the heat on under your canner. (Waiting for the steam plume to start in earnest can take an additional 5 – 15 minutes.)
When your timer goes off it's time to apply the pressure! Set your weight to 10 lbs of pressure. Keep the heat on and when the weight begins to rattle set your timer. How long you maintain pressure depends on your jar sizes:
Quarts: 25 minutes
Pints: 20 minutes
I always adjust the heat so that my weight is rattling on and off every few seconds rather than a constant rattle that makes me think my pressure canner might explode at any moment. You don't want long gaps between rattles, but two to three seconds is great.)
When your timer goes off turn off the burner. Don't you open the canner! Don't even try. And don't quick-cool the lid by draping a damp towel over it. Just leave it be. Seriously. Otherwise you're fixing for an exploding broth disaster. For. Real.
Allow your canner to cool for 45 minutes or more, then remove the weight and carefully remove the lid.
Use a jar lifted to carefully remove your jars and place them on a towel to cool. Oh, and they will likely still be boiling away inside the jars, a bizarre sight to behold on the counter top.
If you are using Tattler BPA-free lids, then using a hot pad for each hand, tighten your rings and allow the jars to cool for four hours. If you are using regular lids, simply remove and leave the lids be.
After four hours check that your lids have sealed by pushing down on the center of the lid. If the lid is sucked down it is sealed. If not transfer to the fridge and use within a week or transfer to wide-mouth pints filled 3/4 full and freeze.
Allow the sealed jars to sit undisturbed for 12 hours.
After 12 hours remove rings, double-check that the lids are tightly sealed, label and transfer to your pantry.
We've been enjoying probiotic ginger bug sodas at our house for years. Indeed, at the autumn Herbal Retreat the ginger bug soda I brought was the first beverage gone during the weekend! I love ginger bug drinks because they are loaded with good bacteria, naturally carbonated, subtly sweet, and easy to make.
I have been meaning to share a tutorial with you for ages but didn't get around to it until now. (I even took these photos years ago, as Lupine's size will attest.)
Ginger bug is one of the easiest home ferments to try. The starter calls for just three ingredients (water, sugar, and ginger) and then the final sodas can be crafter from your favorite herbal teas.
It's a simple way to get some good bacteria into your diet! Ready to give it a try? Here's how.
Ginger Bug How-To
There are two steps to making a ginger bug. Like sourdough, you first create a starter. The starter is quite gingery and not a beverage in it's own right, but what you use to carbonate a sweetened tea that becomes your soda.
It's important to use actual sugar (not maple, honey, or coconut sugar) for this recipe. Like with homemade kombucha, the probiotics in the ginger bug are going to eat most of the sugar (not you), and to be a strong culture they need actual sugar. I use organic unbleached cane sugar.
First we'll make the starter (it takes about a week to get going). Then we'll make our drink.
Step 1: Ginger Bug Starter
3 cups water
2 tbsp grated ginger root (with the peel) and additional ginger for feeding starter
2 tbsp organic sugar and additional sugar for feeding starter
Combine all ingredients above in a quart-sized mason jar and loosely cover. (Use a cloth fastened with a rubberband or a canning jar lid with the ring only screwed on part way.)
Each day add 1 additional tbsp grated ginger root and 1 tbsp organic sugar. Stir to combine with a wooden spoon, and replace cover.
Continue feeding ginger bug daily. After approximately 5 to 10 days the mixture will begin to carbonate. (In warmer homes this happen more quickly, in cooler homes more slowly.) You'll notice bubbles in the jar, especially when stirring.
Step 2: make your soda
Now the fun begins! Use your ginger bug to create live-fermented sodas. To use, strain off 1/4 cup ginger bug starter and add to a clean quart jar.
Add 3 1/2 cups of cooled, sweetened herbal tea (again using organic sugar). Stir, then tightly lid jar and leave on the counter for 3 – 7 days until carbonated. (I check by pushing down on my lid. When it feels hard from pressure from inside the jar I know it's ready.)
Check your jar daily to prevent your jar from exploding under too much pressure! Burp your jar daily after the first three days to check carbonation level and prevent your jar from exploding.
When soda is fizzy transfer to the refrigerator for an additional 1-4 days to finish fermenting, then enjoy! I often add a generous squeeze of fresh juice before I transfer to the refrigerator. Keep any remaining ginger bug soda refrigerated until ready to drink.
Maintain your Starter
Each time you remove a 1/4 cup of starter from your ginger bug, replace the liquid with an additional 1/4 cup of fresh water. Continue to feed your starter daily. If you feel you are not using your starter quickly enough you can slow it down by transferring it to the fridge and feeding with 1 tbsp grated ginger root and 1 tbsp organic sugar just once a week.
When your jar begins to feel overwhelmed with grated ginger strain 1/2 of it out, compost, and continue to feed your starter.
For soda flavors, try anything that would translate to a tasty sweet-sour carbonated drink. I love anything citrus and enjoy adding fresh or frozen berries, a squeeze of fresh juice, or some citrus peels to my soda during the final days of carbonation.
If you're buying tea to use try sweet orange, hibiscus, or green tea.
I made a small batch of Limoncello for my sister this fall. Sadly (not sadly) it didn't all fit in the jar and I had to keep a 1/4 pint for myself. And oh. My. Goodness. I'm not sure when I've tasted something so divine!
Sweet but not overly so, lemony and smooth, it was dreamy. I wanted to try a batch without refined sugar (something my body doesn't love) and I thought honey would pair nicely with Meyers. And so I set to work on a second batch, tweaking my recipe until I found a method that worked for either honey or sugar.
And here it is.
Make a batch now and it will be ready to bottle up before Valentine's Day.
You can share a few small jars with your friends, your neighbors, and your sweetie. (But take my advice and keep a jar for yourself, too, won't you? You'll be glad you did.)
Homemade Organic Limoncello Recipe
Ingredients
6-8 organic Meyer lemons (6 for slow infusion, 8 for quick) (If Meyer lemons are not available feel free to substitute regular lemons)
3 C organic vodka (I found this brand at our local grocery store.)
1 C organic sugar (or 1 scant C raw honey)
1 C water
Instructions
Making limoncello is deceptively simply. Honestly. And while this project takes two to six weeks to complete, the hands-on work takes just minutes. And the results are out of this world.
First, decide how limoncello you want.
Then make a little more. Because you can trust me when I say that you will want to keep some for yourself. One batch will yield approximately 1 1/2 pints (give or take), and the recipe easily doubles or triples. (To save you the math, a single batch will use up 2/3 of a 175 ml bottle, so if you buy two you can crank out a triple batch. Do it.)
Second, evaluate much time you have.
Is this a hurried project for a gift? Something you'd like jarred up in just two or three weeks? Get the extra lemons. It will yield a flavorful limoncello, despite the rush. Have a full month or more for your infusion? Six per batch is plenty.
Third, infuse your vodka.
Wash and dry Meyer lemons.
Remove zest using a vegetable peeler or paring knife, removing as little pith as possible. Reserve lemons for another use. (I shared a few ideas at the bottom of this post.)
Place lemon zest in a glass quart jar and cover with vodka, approximately 3 C. Be sure all zest are submerged, then cover and tuck away in a dark cupboard.
Give it a stir every week or so, and allow to infuse for 2 to 6 weeks. When your limoncello is fragrant and the peels are beginning to lose their vibrancy it's time to strain. (For the rushed batch the peels will still be bright when you strain. That's normal.)
Compost the zest, or if you did the quick batch cover with a smaller amount of vodka for a second round.
Fourth, make a simple syrup.
On the day that you strain your infusion, place 1 C water in small saucepan over medium heat. When warm add sugar or honey stir to dissolve. Allow to cool, then add to your limoncello to taste. (You'll probably add most if not all, but you never know, so add and taste, add and taste.)
Transfer to a pretty little mason jar or two, label and share.
Oh, and tuck one away for yourself too.
(You're welcome.)
What to do with those lemons?
I do not view a mountain of zestless Meyer lemons as a problem. Honestly, it's just an invitation to make more delicious things. Here are a few ideas for you.
Frozen lemon quarters for warm lemon water
When I find myself in this delicious predicament I usually just quarter and freeze the lemons for my morning lemon water habit. Then in the morning I drop a frozen lemon quarter in my mug and cover with warm water. After a few minutes I squeeze the lemon with the back of the spoon and enjoy.
Starting your day with warm lemon water is healthy habit to begin. It aids digestion, is a gentle detox, boosts the immune system, hydrates your body and your skin, and more. (Be further convinced here.)
Meyer lemon curd
You really can't go wrong with lemon curd. This recipe (like most) calls for lemon zest, but don't be dismayed. Just replace it with a touch of extra juice. It won't be exactly the same but it will still be divine.
Grass-fed Meyer lemon gelatin
If you haven't made 'jello' with real, whole ingredients you're missing out! We love it over here. Use this recipe and your lemons, but know that you might need an extra drop or two of honey since even Meyer lemons are more sour than oranges.
Yum.
Frozen juice cubes
And while this is arguably the least exciting idea on my list, I love to juice my lemons, then freeze the fresh lemon juice in an ice cube tray. Pop the cubes into a jar and store in my kitchen freezer, they are lovely to have on hand for soups, pancakes, salad dressings… all the things that would benefit from a little lemony spunk.
I originally shared this tutorial back in 2011, and it's still a favorite sewing project.
Quick, satisfying, and the best way I can think of to burn through a box of scraps without making a quilt. (Which, frankly, is way too much of a commitment in my life.)
The bunting pictured below hangs in the break room at LüSa Organics, and I have another that decorates our camper, Nellie.
I also made one for each of the kids for their birthday celebrations. Needless to say, this project is addictively satisfying. Buntings are easy to make and adorable. Done in a single solid fabric (say with white pennants and a pale aqua ribbon) is a classy and fun way to dress up an otherwise serious room.
I say sew up a while happy little army of them. We could use more reasons to smile.
How to Sew a Fabric Bunting
There are no rules for bunting size, spacing, length, or shape. Use my formula below, or just use it as a jumping off point for your own design.
Materials & Supplies:
Fabric for triangles, of an assorted or single Fabric for banner tape, 4” wide x your length as determined above Fabric marking pen Sewing Machine Coordinating thread (if the color of your bunting spreads across a wide spectrum, light gray or tan works well for most colors) Rotary cutter or shears and cutting mat Straight pins Measuring tape
Step 1: A Bit of (Easy!) Math
This step is optional, but helpful if you want to know how long your bunting will be. If you don't care, skip the math. If you care, dig in. It'll take you all of two minutes.
First, determine how long you want your bunting to be. To do so, measure the area you want the bunting to span. Add two 24” tails if you want to be able to secure the bunting to something. (like a curtain rod or table leg) and 10” for drape.
For example:
If your banner will span a 6’ (72”) table, you will need:
72” span + 48” tails + 10” drape = 130” length.
Across a 10’ (120”) tent you will need a span of:
120” +48” tails + 10” drape = 178” length.
Second, determine the number of pennants or triangles you need. To find this number, subtract your 48” tails, then divide by 10 (the span of each pennant) and multiply by two (the triangles are two sided).
For example, the 6’ bunting will require:
130” – 48” = 82”/10 x 2 = 16.4. Round up to the nearest even number. For the 6’ bunting we’ll make 18 triangles for 9 pennants.
Across the 10’ span you will need:
174” – 48” = 126/10 x 2 = 25.2. Rounds up to 26 triangles for 13 pennants.
Step 2. Cut Your Triangles
Cutting the triangles is fastest with a cutting mat and rotary cutter, but is still easy to do with sharp scissors. To make your triangles:
Cut your fabric into strips the height of the triangles (10").
Fold your fabric strip in half matching short edges carefully.
Measure in four inches from the raw edge and mark this point on the top edge of the fabric with a fabric pen.
Connect this point to the corner on the lower edge of the fabric. Cut off this scrap triangle and discard.
In the name of fabric economy you will cut your triangles by alternating point up and point down placement. Measure in 8” on the long side of your fabric and cut. Now measure in 8” on the opposite side and cut. Continue until you have the proper number of triangles, as determined above.
Step 3. Sew the Pennants
To make a sturdy, two-sided bunting we will sew together pairs of triangles, then turn them right-side out. (You can also make your pennants one-sided and skip the steps below. Cut triangles with a pinking shears to discourage fraying but know that this type won’t weather quite as gracefully as sewn pennants. Still cute, but a bit less sturdy.)
With a ½” seam allowance, sew each pair of triangles with right sides together leaving open on the top (short) side.
Cut off the point of triangle and turn right-side out. Use a small crochet hook or larger knitting needle to push out the point.
Press each triangle.
Repeat with remaining triangles and set aside.
Step 4. Create Your Fabric Tape
You may choose to skip this step and proceed with grosgrain ribbon or store-bought bias tape. The choice is yours. I have done many variations on the bunting and my favorites used homemade fabric tape (or homemade bias tape). This is also by far the most affordable option. In essence you are cutting a long fabric strip, then folding and pressing the cut edges inside. You might recognize my fabric from the duvet I made for Lupine a couple of years back out of vintage bedsheets. Or you might not. Regardless, it is time to make some bias tape.
To make your tape:
Cut your fabric into 4” wide strips until you have more than the required length determined above.
With right sides together, sew each strip to the next and press open the seams. You will have one very long strip of fabric.
Finish the ends by pressing under ¼”, then pressing under ¼” again. Hem.
Fold in half lengthwise, wrong sides facing, and press.
Open the fabric and bring each raw cut edge in to meet at the center (press line) and press again. Here it will begin to resemble purchased bias tape.
Fold one last time along your original lengthwise center fold, and press again.
Step 5. Sew Your Bunting For the free-spirits among us, just wing it. (That is my usual process.) If you prefer to end up with a bit more predictability and precision in your bunting, follow these simple steps.
Begin by finding the center of your fabric tape. Open your fabric tape (without unfolding the raw edges) and insert the raw edge of a triangle. If you made an odd number of triangles center your first triangle at this mark and pin into place. If you had an even number of triangles pin ½” to one side of the center mark.
Working in both directions from this center point, space triangles 1” apart and pin until you reach the approximate edge of your 24” tail (give or take). If you have a triangle or two left over don’t despair. Perhaps they will make themselves useful in a future project.
Begin sewing at one end of your banner. With a ⅓” seam allowance, sew your banner. Topstitch along the upper edge of the banner as well and your sweet bunting is complete!
You may choose to applique letters onto your bunting (like your child's name or an inspiring word like "play" or "happiness"). If you applique, do so on one side of a triangle allowing adequate space around your work before you sew the backs to the triangles.
Since Sage was seven I have made and remade this hat for my kids every summer it seems. Plain or fancy, detail patchwork or all one print, it's fast and easy to stitch up, year after year.
I sketched the original pattern back in 2010 and am sharing it with you once more today.
Sewing hats sounds hard. But this pattern? Easy-peasy. Seriously. You've got this.
Love, Rachel
After a long, dark spring the sun is shining once again.
To celebrate, I sewed a new sunhat for each of my kids last week.
Lupine's is a spunky, patchwork incarnation of the same pattern.
To modify the pattern for Lupine that I originally designed for her brother, I mixed up the colors and added a narrow patchwork strip to the side.
The patchwork is my favorite small detail on this hat. It is a simple addition, but takes the hat to a different level of cuteness. I created it with scraps from her baby sling and several outfits I've sewn for her. It also allowed us to use a favorite but barely too-short fabric for the main hat piece.
She is thrilled with it and proudly announces what each fabric was from when she shows it off.
The hat is reversible and lined in a single print (from another mama-made outfit), so it's two hats in one!
Want to make your own? Of course! The pattern and instructions are below. I've simplified them a bit since I first shared this pattern, including PDF files that should be easier for you to print to scale.
Enjoy! Rachel
Summer Sunhat for Girls & Boys
Materials:
Pattern – three pieces (below). To print, follow the instructions below.
Outer fabric
Lining fabric
Timtex or other stiff interfacing for brim (afflink)
Matching thread
All sewing was done with a 1/2 inch seam allowance. This is sized for my 6-8 year old. Adjust as needed to fit a younger or older child.
1. Print out pattern pieces.
To print, click on the PDF files below.
Save files to your desktop.
Open and print each file without scaling. (The Sunhat Crown should measure 7 3/8" across.)
Sunhat Band (No pattern piece. Rectangle 21.5" x 4")
Cut two (one lining, one outer fabric). This can be a sold fabric or pieced fabric as shown above.
To add a patchwork band as above, cut your main fabric rectangle 20" long. Sew a 2" wide patchwork band that is 4" tall. Join patchwork and main color and trim to size.
Sunhat Brim
Cut three (two outer fabric, one interfacing.) Note: When you cut out your paper pattern fold and cut so you have the entire 1/2 moon. I only copied down 1/2 of the pattern to make it fit on a single sheet.
Sunhat Crown
Cut two (one lining, one outer fabric)
3. Sew Brim
Cut interfacing brim down by 1/2 inch on all sides.
Sew outer curved edge of brim, right sides together.
Turn and press.
Insert interfacing and trim if needed to fit smoothly inside.
Top stitch outer curve through all layers to hold interfacing in place.
Sew Crown
Fold hat band so that the short ends line up (right sides together), creating a flattened cylinder. Sew.
Pin cylinder shape carefully to hat top (also right sides together). Sew.
Turn right side out and press.
Repeat with lining.
Pin brim to hat, centered opposite of back seam with top side of brim flat against front of hat (it will look like someone flipped the brim up, 1980's grade school style). If you added a patchwork or vintage embroidery detail, align this with the edge of the brim or place it wherever you like it best.
Sew into place and flip down. It should be starting to look like a hat now!
Press under 1/2" on bottom edge of hat and hat lining.
Insert hat lining into outer fabric hat and top stitch together very close to the edge.
In the eternal search for the perfect gluten-free/egg-free/cultured dairy-only pancakes, we finally have a winner!
Shooting from the hip one morning last week I improvised pancakes that are fast-tracking their way to "favorite breakfast" status over here. Simple, quick, and downright foolproof, these pancakes lack the rubber hockey puck effect of so many egg-free gluten-free recipes that we've tried.
There is dairy involved (yogurt) but I suspect they would work beautifully with any dairy free milk you like, soured for a few minutes first with apple cider vinegar or lemon juice. (I'll update the post after I give that a try, or leave a comment below if you try that variation yourself! I tested a dairy-free version this morning and it was just as good! I added instructions below.
Nutritiously speaking these are even better if you plan ahead the night before. Instructions follow for night-before or same-day prep.
Combine chia or flax seed meal and water. Allow to sit for five minutes, then add yogurt.
Whisk in sorghum and buckwheat flour and coconut sugar.
Add additional water as needed if consistency is too thick.
Whisk in baking soda until just combined.
Heat skillet over medium high heat, and butter or oil. Cook and eat!
Overnight Pancakes How-To
12 to 24 hours in advance, combine chia, water, and thinned yogurt.
Whisk in sorghum and buckwheat flour.
Add additional water as needed if consistency is too thick.
Place in a covered dish in the refrigerator until ready to use.
Your mix will likely be quite thick after sitting overnight. Thin with water until desired consistency is reached. Then whisk in coconut sugar and baking soda until just combined.
Heat skillet over medium high heat, and butter or oil. Cook and eat!
Dairy-free Version
To make these dairy free simply replace yogurt with 1/2 can of full-fat coconut milk and 1 1/4 tsp apple cider vinegar. Proceed as above.
Makes approximately ten 4" pancakes.
Variations: if you make your own almond milk, add your leftover pulp to a batch. Or try substituting sorghum flour with cornmeal, millet, almond, or other alternative flours. (This morning we were out of sorghum and added a combination of almond and cornmeal. Delish!)
In a previous life (back when I was 20-something vegetarian college student) I remember standing in the beans/canned goods isle at the grocery store. I was comparing a can of organic black beans to a can of conventional. I was at a cross-roads where organic food (a new concept to me) had begun to make sense. But in that moment I backed away from that turning point because of price.
I bought the conventional.
And I continued to do so for another five years.
Back then (in 1996) it was something like $1.45 for a 15 oz. can of organic canned beans, but conventional would run you only 67 cents. It never occurred to me that if I made black beans from scratch I could have eaten organic for far less than I was paying to eat conventional.
Wait, wait. That needs a bigger font.
It never occurred to me that if I made black beans from scratch I could have eaten organic for far less than I was paying to eat conventional.
Because in my mind I was simply buying food. Not processed food, just food.
But (surprise!) beans don't grow in cans. It's true. And therefore they were indeed, well, processed.
And anytime you buy processed, convenience, or packaged foods you not only pay more at the store but you also often compromise quality, flavor, and ingredients.
But let's stick with price.
I checked my local food coop just yesterday and dry, organic black beans are currently $2.69 per pound. (If I picked them up through our buying club I'd pay even less.) So let's do a little math, just for fun. (We're homeschoolers, after all. It's what we do.)
If 1 lb black beans = 2 cups;
and 1 15 oz can black beans (purchased) = 1/2 c dry beans (or 1/4 lb);
then 15 oz of homemade black beans (the equivalent of one can from the grocery store) is – wait for it – 67 cents.
Remember that can of conventional beans I bought back in 1996? Yep. Same price, except now it's 20 years later. And they're organic.
Meaning: you can eat organic home-canned black beans in 2016 for the same price as purchased conventional canned black beans in 1996.
Let's pause for a moment and let that sink in, shall we?
.
.
.
I know. Seriously.
And by canning beans at home not only am I ready for spur-of-the-moment meals, but I can control the ingredients. As in: these are packed with cumin and garlic and cooked in bone broth, and my can's aren't lined with BPA.
And this whole project took very little time, yet put nine pints of beans on my pantry shelf. Winning!
Ready to triumph over your pressure canning fears and save buckets of money on your grocery bills? Darn right, you are.
Here's how.
How to Pressure Can Dry Beans
(red, black, white, kidney, garbanzo, or otherwise)
Makes 9 pints
Recipe can be doubled or halved easily. I shoot for around 3 lbs (9 pints) due to the size of my canner. Adjust as needed for yours.
Ingredients
3 lb dry beans
3 Tb whey or apple cider vinegar (ACV)
5 quarts homemade bone broth (highly recommended) or purchased broth or water
9 large or 20 small cloves of garlic, sliced or crushed
4 Tb ground cumin
kombu seaweed, 1 small piece per jar (optional)
Process
Soak beans for 24 hours (or at least overnight) in enough water to cover the top of the beans by at least 3". Stir in whey or ACV.
After 24 hours drain off soaking water and rinse.
Place beans in a large cooking pot with garlic, cumin, and enough bone broth to cover beans by 2".
Bring to a boil, reduce to a simmer, and cover. Cook for 30 minutes and remove from heat. (Your beans will still be hard and inedible. They are supposed to be. The cooking will be completed in the canner and you won't have mushy beans.
While the beans cook wash your jars in hot soapy water to pre-warm them. Rinse and drain. Prepare your jar lids according to manufacturer instructions.
Fill your jars. To ensure that I get the right proportions of beans to broth I strain my beans out of the bean cooking broth with a ladle and divide them among my jars as show below. Then I top off with the seasoned bean cooking water, dividing it evenly between all jars. If needed add additional broth or water to fill jars to 1" below rim. Add a small piece of kombu to each jar if using. (1" x 2" is adequate.)
Dip a cotton cloth or paper towel in white vinegar and wipe the rim of your jars. This will ensure a clean rim and a good seal. You can also use water but I'm partial to the vinegar trick.
Top your jars with lids and screw on rings "finger tight". (If you are unsure how tight that is simply tighten the rings fully, the loosen approximately 1/2".
Meanwhile, heat approximately 3" – 4" of water in your pressure canner. (Unlike a water bath canner you don't submerge your jars fully in a pressure canner. The steam pressure does the work this time, not the simmering water.) Add a splash of vinegar if you have hard water to prevent minerals from coating the outside of your jars.
When your jars are lidded and the canner is simmering, it's time to load up! Affix the lid on your canner but don't engage your weight yet.
Watch your canner. When a plume of steam escapes from the valve set a timer for 10 minutes. Keep the heat on under your canner. (Waiting for the steam plume to start in earnest can take an additional 5 – 15 minutes.)
When your timer goes off it's time to apply the pressure! Set your weight to 10 lbs of pressure. Keep the heat on and when the weight begins to rattle set your timer. How long you maintain pressure depends on your jar sizes:
Quarts: 1 and 1/2 hours
Pints: 75 minutes
I always adjust the heat so that my weight is rattling on and off every twenty seconds or so rather than a constant rattle that makes me think my pressure canner might explode at any moment. You don't want long gaps between rattles, but five to thirty seconds is great.)
When your timer goes off turn off the burner. Don't you open the canner! Don't even try. And don't quick-cool the lid by draping a damp towel over it. Just leave it be. Seriously. Otherwise you're fixing for an exploding broth disaster. For. Real. Leave the weight in place as well.
Allow your canner to cool for 45 minutes or more, then remove the weight and carefully remove the lid
Use a jar lifted to carefully remove your jars and place them on a towel to cool.
If you are using Tattler BPA-free lids, then using a hot pad for each hand, tighten your rings and allow the jars to cool for four hours. If you are using regular lids, simply remove and leave the lids be.
After four hours check that your lids have sealed by pushing down on the center of the lid. If the lid is sucked down it is sealed. If not transfer to the fridge and use within a week or transfer to wide-mouth pints filled 3/4 full and freeze.
Allow the sealed jars to sit undisturbed for 12 hours.
After 12 hours remove rings, double-check that the lids are tightly sealed, label and transfer to your pantry.