Homemade herbal chai recipe.

Best homemade chai recipe. | Clean.

Best homemade chai recipe. | Clean.

Best homemade chai recipe. | Clean.

Some time ago I shared my old nettle chai recipe with you. And really, it's good. So good.

But since that time I have continued to tweak and refine the recipe, week after week.

Like so many things, cooking – and yes, simply making tea – is a living process around here. And where that recipe is at now – well, that old version just can't hold a candle to it.

So I jotted down my latest recipe for you. The changes are minor – just four new ingredients. But to drink it is to love it. As in seriously obsessively love it.

It's crazy good.

This newest incarnation of chai is spicy and sassy and sweet and amazing.

And caffeine-free to boot without feeling like something was forgotten. I loved the nettle version I shared with you before, but it always felt just a little too thin to me. I knew the black tea wasn't there. But this version? You won't even miss it.

That being said, you can also throw in up to six black tea bags to make yours with a caffienated kick. If I'm jonsing for caffeine I'll often make the whole pot without, then add a single tea bag to my cup. Then the kids can enjoy from the pot and I can have a little jolt at the same time.

What is different from last recipe?

Here are the four magical tweaks:

Best homemade chai recipe. | Clean.

1. Rooibos

When I cut out the black tea I really missed the dark richness that it gave. The mouth feel of black tea. And no matter what I added I just couldn't reproduce that. Until I tried rooibos. Rooibos is herbal but has the dark richness and thicker mojo of black tea, without the cranky jitters.

2. Star anise

Lupine would tell you it's cute (always helpful in a spice) and she's working on hot gluing one she swiped from my spice cabinet to a barrette. I'm more interested in the smooth, floral edge it lends. Of all four tweaks this is the most subtle, so if you are out of star anise charge forth without it. I add one to a large pot of chai.

Herbal chai recipe. | Clean.

3. Chili powder

Holymoses. I don't know what compelled me to first put chili powder in my tea. (Truly. I have absolutely. No. Idea.)

But since the first morning I did I don't think I've skipped a day. It's surreal how transcendentally good even a humble cup of black or red tea is with a pinch of chili powder. (My standard morning tea is now a cup of black tea with a pinch of ground ginger and a pinch of chili powder.)

And in chai? It's spicy heaven. If you are terrified of spice start slowly but if you are feeling brave add a decent pinch. Good morning!

It's freaking fantastic I tell you.

Do be sure your chili powder is just ground chilies. We don't want salt or funny chili seasoning blend in our tea.

Best homemade chai recipe. | Clean.

4. Coconut sugar

Oh, coconut sugar. Where have you been all my life?

We long ago gave up refined sugar of all types. (Except that type in that hidden pint of ice cream in the back of the freezer. Shhhh…) When we began to eat more Paleo foods we discovered coconut sugar in lots of recipes.

And unlike agave's tarnished reputation and recent fall from hippie food glory, coconut sugar is clean. We reach for it often because it doesn't jack your blood sugar. (A good thing for lots of health reasons. Please don't bring up that ice cream.) It's also easy on your gut and has a more subtle flavor than honey, maple, or stevia in recipes. 

But enough chatter. Let's get on to the recipe, shall we?

Are you ready? Because if you are, know that you'll want this every day. Consider yourself warned.

Best homemade chai recipe. | Clean.

Best homemade chai recipe. | Clean.

Best homemade chai recipe. | Clean.

Best homemade chai recipe. | Clean.

Rooibos-Nettle Chai

2 tsp Cardamon seeds or 2 T cardamon pods (ideally crushed with a mortar and pestle but whole works okay too if your lack of a spice grinder would stop you)

1/2 tsp whole peppercorns

Scant 1/2 tsp cloves

1" x 2" piece of fresh ginger, sliced thin or smashed with the butt end of a knife handle (or substitute 1 scant tsp dried ginger)

1 star anise

1-2 cinnamon sticks or 1 Tb cinnamon bark chips

1/4 tsp chili powder or 1 small whole dried chile

1/2 cup dried nettle

1/3 cup raspberry leaf

1/4 cup rooibos tea

coconut sugar to taste (1-3 tsp per cup, approximately)

milk of your choice (I use raw cow milk but it's outstanding with homemade coconut-almond milk as well.)

Best homemade chai recipe. | Clean.

Best homemade chai recipe. | Clean.

Bring 6 cups water to a boil with the spices. Cover and simmer for 5 to 25 minutes, depending on how spicy you like your chai.

Add nettle, raspberry leaf, and rooibos. (Note: While both nettle and raspberry leaf are safe, healthful herbs, nettle can be a bit drying to your system. In the winter feel free to leave it out if you are feeling dry. I add it because I appreciate the minerals. Listen to your body on this one if you drink it often.)

Remove from heat and steep covered for 15 minutes. 

Strain out and compost your herbs. (Or if you simmered your spices for a shorter amount of time, strain out the first batch of chai, then add 4 cups of water to the herbs, simmer covered for 10 minutes, and then remove from heat. Let it steep all day. You'll have a second batch of chai that's almost as good as the first for no additional effort.)

Transfer your chai infusion to a glass jar and store in the fridge for up to a week.

To drink, combine 3 parts chai with 2 parts milk or whatever proportions your palate dictates. Warm and sweeten with coconut sugar to taste (also lovely is half coconut sugar and half honey, or just honey if you don't have coconut sugar on hand).

Drink and enjoy, and wonder how you ever lived a day without this chai.

Love,
Rachel

P.S. Did you know that chai means tea? So if you call your chai "chai tea" you are referring to it as "tea tea". I have few pet peeves. But this is one.

P.P.S. Thank you to my long time sister-friend Ami and her mom for starting this unrelenting chai obsession of mine. I love you. And your chai tea.

P.P.P.S. Thank you for embracing yesterday's tender parenting post. You understand. xo

Oh, mercy. Just one more. My nettle mug is from here. Because you might just need one, too.

Homemade Sriracha Recipe

Homemade sriracha | Clean : : the LuSa Organics Blog

Homemade sriracha | Clean : : the LuSa Organics Blog


Homemade sriracha | Clean : : the LuSa Organics Blog

Homemade sriracha (aka "Rooster Sauce") is oh-so-easy. We've been eating the store bought stuff for years, but Pete read the label recently and we realized that as good as it tasted we just weren't the biggest fans of the preservatives that our favorite brand was adding.

And really, it's so simple. I'm not sure why we haven't been making it all along. It's the perfect blend of chilies, garlic, sweetness and vinegar. The recipe I started with came from here. I modified it to suit our preference, and I've included my version is below.

A note about chilies: please, please wear gloves when you seed your hot peppers. Otherwise you might find yourself up all night, crying with your burning fingers in a bowl of ice water. Or so I am told.

Also a note on color: my rooster sauce is a deep rosy orange rather than the red of purchased sauce. I'm down with that. I buy my peppers from my Amish farmer friend Mary and she grows just about everything. So that's what I get and that's what I used.

Homemade sriracha | Clean : : the LuSa Organics Blog

Homemade Sriracha Rooster Sauce

  • 1 lb of assorted hot chilies, stemmed, seeded (leave more seeds in for more heat), and chopped
  • 1 to 2 heads of garlic (about 8 to 10 average sized cloves), peeled and smashed
  • 2 tsp salt
  • 1 cup white vinegar
  • 1 cup apple cider vinegar
  • 3 Tb honey

Homemade sriracha | Clean : : the LuSa Organics Blog

Make it!

Combine chilies, garlic, salt, and vinegars in a sauce pan. Simmer for 20 to 30 minutes to soften peppers and garlic.

Add honey, remove from heat and allow to cool somewhat.  

Blending hot liquids, especially hot siracha is insanity and can send you to the emergency room. Know how to do this properly to prevent a siracha blender volcano. Because that would be terrible in so many ways. Cool first, then start at your blender's lowest speed.

When somewhat cooled, puree until completely smooth in your blender or in the pan with a submersion blender. Depending on your equipment this will take up to 4 or 5 minutes. In my Vitamix it was fast, but if your blender lacks oomph give it plenty of time.

Allow to sit before you take the cover off of the blender. Don't breathe the steam as it is spicy and will take your breath away! 

Return to pan and over medium-low heat to a simmer.

Homemade sriracha | Clean : : the LuSa Organics Blog

Preserve it!

If you want to you can freezer your sriracha in small jars (or make a smaller batch and just keep it in the fridge), but I chose to can mine. Using the basic canning process I outlined here, can in quarter-pint or half-pint jars in a hot water bath for 15 minutes.

As for how many jars, well… I have no idea. Because:

1) I was so excited about it I keep giving it away to friends, and

2) Pete and his sister (who has spent the past three months with us) are so crazy about it I think the're downing entire jars with breakfast

I will make this every year from here on our. We love it more than my salsa. It's that good.

Edited to add: I just made a batch today and yield is around 5 half-pint jars of spicy goodness. The recipe doubles (or triples, or… well, today I made a 5x batch) beautifully.

Enjoy!

Love,
Rachel

 P.S. Here is a printable version for those who prefer a hard copy: Download HomemadeSiracha

How to make elderberry tincture.

It's that time of year again! So I'm sharing how to make elderberry tincture with you once more. This is a favorite rememdy in our home, all through the year.

As a society we have externalized so much of what we need and want in our lives. Music, clothing, food, entertainment, health care. It's all purchased from outside of our family and our community. So what happens when we jam on the mandolin in the evening, sew some of our own clothes, bake our own bread, and make our own medicine? We come to life. On so many levels. Sure, I sometimes buy bread, most of our clothing come from the thrift store, and I have an Ipod, but to mix homemade and homegrown into every fold of our lives – even the smallest bits – can change everything.

That being said, making medicine is likely a daunting task to most. I broke down a simple fresh elderberry tincture into seven simple steps below. (Aside from chewing up a plantain leaf and placing it on a bee sting, this is almost as easy as medicine gets.)

How to make elderberry tincture | Clean : : the LuSa Organics Blog

I was very much "in the now" when I made this tincture, so there are no photos walking you step-by-step, but it is so easy I think you'll get it without the pics.

I chose elderberry because the elderberries are coming ripe, and because we use a great deal of elderberry tincture every winter. The procedure is as basic as can be. You really only need to be certain of your plant identification before you proceed, and you're golden. (Also avoid raw elderberries as they can cause nausea and vomiting. Don't ask me how I know this.)

How to make elderberry tincture | Clean : : the LuSa Organics Blog

Fresh Elderberry Tincture

1. Locate: Find a site with abundant wild elderberries (sambucus ssp.). We honor the wildcrafting rule of 10/1. For every ten plants (or flowers, or fruits, or mushrooms) in the immediate area, you may take one home. If there are fewer than ten leave them to propagate the area and check back another year. You can also purchase dried elderberries online or at your coop, but I prefer fresh.

2. Harvest: Pick your elderberries right on the umbels (umbrella-shaped berry clusters). The stems are hollow and the fresh clusters snap off with ease. Don't fuss with picking off the individual berries. We'll get to that at home. Gather the ripest, almost black berries.

3. Freeze: When you have a bag-full take the berries home and pop them in the freezer. When frozen the berries will crumble with ease off of the stem.

4. Separate: Crumble the berries off of the stem into a bowl and transfer to a quart jar. Fill the jar with berries to just below the shoulders. Allow to thaw.

5. Muddle: With a wooden spoon or kraut pounder break the berries open a bit. You don't need to pulverze them, but muddle them up a bit. Some seeds will become exposed, and they look a little like bugs – so don't freak (see photo above).

6. Steep: Cover to in inch or two above the berries with good brandy (in Wisconsin a basic decent brandy is Korbel, so that's what we use). Lid, label, and tuck away in a dark quiet corner for 4 to 6 weeks. Tip the jar over and gently shake every time you think of it.

7. Bottle: Strain through a stainless steel colander lined with a thin cloth. Store in amber dropper bottles or glass jars in your medicine cabinet.

You can take a few drops of elderberry tincture often throughout the winter months. Dosage is as follows when feeling under the weather:

Adults 20 drops 2 – 3 times/day in water

Children 10 drops 2 – 3 times/day in water

Butternut Squash and White Bean Soup Recipe.

Is it that time again?

Yes. It's squash season. This soup will be on regular rotation around here once again this fall. If you made it last year, I'd love to hear how you liked it and what (if any) adaptations you have made.

Squash and White Bean Soup | Clean : : the LuSa Organics Blog

Butternut Squash and White Bean Soup | Clean : : the LuSa Organics Blog

Butternut Squash and White Bean Soup | Clean : : the LuSa Organics Blog

Butternut Squash and White Bean Soup | Clean : : the LuSa Organics Blog

Butternut Squash and White Bean Soup | Clean : : the LuSa Organics Blog

Butternut Squash and White Bean Soup | Clean : : the LuSa Organics Blog

(I know. That's not a butternut squash up at the top of the post.
But the cut up one is! Another great example of use-what-you've-got.)

I made a soup this weekend that I could eat every day. Warm and sweet
and savory and nourishing through and through. Local butternut squash.
Kale and sage from the garden. White beans. Homemade stock. Amazing
goodness in every way. I love food like this.

Pete and I thought it was the best soup of the year. The kids were
honestly so-so about it the first day, so on day two I added a few
pieces of crispy bacon minced up and, well, there was none left for day
three. Oh, my. (Mind you I haven't had bacon in most of a year since it
is not GAPS legal -sugar in the curing process- so it was over the top
for us all.) Hallelujah. With the added bacon it was elevated to the
best soup ever.

Since I made this up as I went along and I
never measure anything, there was no recipe. But I love you. So I did my
best to make up a recipe so you can share in a bowl of my new favorite
soup. You can't go wrong with this combination. And so while my
quantities below are a bit sketchy, go with the flow. You'll find your
own perfect combination. 

Butternut Squash and White Bean Soup | Clean : : the LuSa Organics Blog

Autumn Squash and White Bean Soup

1 medium-sized squash, cubed and roasted (I used a butternut but the
red kabocha pictured at the top will be in the next batch later this
week.)

1 qt of just under-cooked white beans. (Ideally you will first soak
for 24 hours in water and 1 tb of whey from your yogurt; drain, rinse,
and cook in bone broth for 20 – 40 minutes on low heat with 2 cloves of
garlic.)

1 large bunch of kale, approximately 12 decent sized leaves, stemmed and chopped

1 small bunch of fresh sage or a big pinch of dry (if fresh use 8-10 leaves)

1 medium sweet onion, chopped

2 cloves of garlic, minced

Butter, ghee, coconut oil, or bacon grease

6 slices of crispy bacon, chopped

Salt to taste

Bone broth (4 C or so) (Homemade. Please?)

In your favorite soup pot, saute onion in 2 Tb of fat until
translucent. Add garlic and cook for another minute. Add cooked white
beans, roasted squash, and enough bone broth to cover. Stir, salt, and
bring to a simmer. Remove 1/4 of the soup and puree until smooth. Return
to pot, add kale, and stir. Cover and simmer until kale is tender.
Serve topped with crispy bacon (or not).

Eat, laugh, and then dance around your kitchen pondering where this lovely soup has been your whole life.

Love,

Rachel

P.S. Do take the time to make your own bone broth
this season. All you need are the leftovers from any meat-eating you do
(fish or beef bones, chicken carcass etc.). It might be the single most
important thing you do for your and your children's health. I've always
made my own stock but bone broth became vital when we noticed Lupine's
early childhood tooth decay. We need what's in this magic potion! Every.
Day. Okay – stepping down off my soap box. Or bone-broth-box, as it
were.

Confidence in a home-cooked meal.

DSC_5580

DSC_5590

DSC_5604

DSC_5610

I wanted to share a story from our participation without coercion experiment.

When we broke down our weekly responsibilities the kids each agreed to cook one meal per week.

Two nights ago Sage was in charge of dinner. His menu was homemade meatballs and red sauce with sauteed zucchini. (Because I'm veggie-crazed I did add a salad to the mix. I hope that doesn't count as micro-managing.)

It was hands down the tastiest meal we had all week.

I don't have many photographs because this kids loves his privacy. In fact, he didn't want me to photograph the final meal, as beautiful as it was. But I will tell you this: when that dinner was set on the table and we gathered around it to eat he was beaming. He was proud, confident, and felt the satisfaction of hard work.

He planned. He shopped. He found recipes. And then he cooked. Sage put hours into this meal. And when all was said and done? The word awesome was used to describe the entire experience. (And not just by me.)

Foraging apples.

DSC_5208

DSC_5210

DSC_5214

DSC_5207

DSC_5203

DSC_5213

DSC_5222

DSC_5226

Is it apple time already?

This hot, dry summer has had me longing for some crisp fall days. And while autumn is still a ways off, the apples have begun to ripen.

Like so many crops they are early this year.

Last week we slipped away for six days at my parent's cabin on the Wolf River. (You probably didn't miss me because I posted while we were away. Hooray for technology and the "select publication date" feature on Typepad.)

During our vacation Lupine and I visited a wild apple "orchard" that we pick at every year. We went twice, and on the first foraging day we had a conversation I want to remember always. It went like this:

Lupine: "Mama, this is the best day of my entire life."

Me: "Oh, Lupine. I'm so glad. Thank you for being my foraging buddy."

Lupine (as she threw her arms around my waist): "Thank you for being my foraging buddy, Mama!"

At which point my heart melted into a big puddle of love.

Sigh. Sweetness overload.

A few of our favorite trees were ripe already, including this one that Lupine has nicknamed "Cake" because, well, "it tastes like cake."

I've been picking this particular tree for more than 20 years. (Though I've always simply referred to it as "my favorite apple tree" rather than "Cake", though her name has grown on me and now I call it "Cake" too.)

My grandpa and I used to pull his old pick up tree underneath and fill the bed with apples for baiting deer, and yes, apples for saucing and eating.

I always made sure the deer didn't get any good ones from this tree.

This old tree is nearing the end. It's split and rotting out on the inside. It's much smaller than it use to be, as one whole section had dropped off in the past five years. I'm planning on grafting a branch onto a younger tree so we can continue to enjoy Cake Apples for many more years. I think I'd better hurry or I'll lose my opportunity. 

In all, Lupine and I picked one large cooler-full. It's in the kitchen now, brimming with the ugly-yet-delicious apples. Today we'll juice (for our first experiments in hard cider making) but mostly we'll sauce.

And I can hardly wait.

(My instructions for making and canning apple sauce are here.)


Kale: a love story.

DSC_4360

DSC_4364

DSC_4325

DSC_4357

DSC_4331

DSC_4373

DSC_4371

The garden is brimming with kale.

Kale.

Our favorite green.

Kale.

Whom we crave and eat all through the year.

Kale.

That we (guiltily) buy from California in February long after our freezer stockpile has run out.

Oh, kale. How we love you.

So I planted twice as much this season as I did last year in hopes of a stash in the freezer to last us through until spring. Recently I looked into the garden and couldn't believe how much kale there was. Despite the aggressive and enclosing weeds, there was serious kale happening out there. A few good rains and the plants (as one friend put it about her own crop) had "turned into palm trees".

So Lupine – my faithful garden helper – and I headed out with our harvest baskets.

We picked kale until we couldn't carry any more, than brought it inside to process.

Kale is pretty straight forward to put by, like any sturdy cooking green.

Quite simply: Rinse. (If you care to. Which I don't.) Stem (As in cut out the tough rib down the center). Chop. Blanch. Chill (with a dip in some ice water). Drain. Bag or jar up. And freeze.

That's all there is to it.

And armload after armload of kale was transformed into a (rather small) armload of bagged kale headed to the freezer. Greens are funny that way, aren't they?

Regardless, it's (good, nourishing, homegrown, affordable) food for winter. With more to come in long after the first frosts.

Food for the winter.

It's stocking up.

Remind me again: Why do I do this?

DSC_4205

DSC_4219

DSC_4215

DSC_4212

DSC_4216

DSC_4198

DSC_4206

Yesterday I did not cry over spilled milk.

Or spilled cream.

Come to think of it, I did not cry over the spilled yogurt, salt, vinegar, bone broth, or tea that also found their way onto my once clean counters, floor, and the inside of our refrigerator yesterday. (Those spills I handled with varying degrees of grace.)

I did, however, cry over the spoonful of ghee that spilled directly into my pickling brine. The brine that I made from the very last of my apple cider vinegar.

Poor kid. He was just trying to make quesidillas. It was simply poor planning that his path with the dripping spoon when directly over my simmering pot.

I had to leave the kitchen.

I threw myself face down on my bed and shed a few tears, then collected myself and returned to start the brine again (with the white vinegar I keep on hand for cleaning).

But really I wasn't crying over spilled ghee as much ans I was crying over the overwhelming size of the bushel of green beans in my kitchen (a full sized cooler filled right to the top) and the shadow of a second bushel looming on the front porch. 

So I had a little cry and got back in the game canning pound after pound of dilly beans and wasabi beans for the fall and winter.

I was overwhelmed.

And could have used a little perspective. My friend Mary for example cans thousands – literally tens of thousands – of quarts of food each summer. She showed me her pantry once and I was speechless.

She is feeding herself, her husband, and their seven boys. Mary is Amish and therefore she does this work without electricity over a woodstove in their kitchen – regardless of the temperature outside. She washes her thousands of jars without consistently running water and does her clean up by heating water on the woodstove.

(As an aside she once referred to herself as "lazy" to me in conversation because of a modest shortcut she takes when canning pickles. I almost fell off my chair.)

Mary's family survives on the food she puts by. Canned produce, root cellar veggies, pantry staples, and dairy from their cows feeds them all winter.

So how can I complain about a little work with a box of beans yesterday?

But hard work is hard work, regardless of who's doing more. When I forget about the work my friend does for a moment, canning almost 30 pounds of beans is serious. Heck, canning 30 pounds of anything is a big deal.

But unlike my friend I have a chest freezer. A refrigerator. Air conditioning. I've got a pretty cushy life here. I don't need canned beans in my pantry for the survival of my family.

Dilly beans won't save us if things start to fall apart.

And on days like yesterday when I feel overwhelmed by the choices I have made I wonder: why am I doing this?

Because when I am not in my flow canning the abundance of the season feels a lot like whacking my head against the counter.

DSC_4201

But then it happens.

The jars begin to line up in long steaming rows on the towel.

And all of a sudden I can measure my success. The cooler of beans begins to empty and the counter of jars begins to fill.

And in that moment I remembered why I was doing this.

Because I can. (No pun intended.)

Because my hard work now feeds us – in part at least – throughout the year.

Because I would rather eat one jar of homemade dilly beans that 100 jars of store bought. Because these beans have soul.

Because I planted seeds and harvested fruit (or in this case connected with a farmer doing that work, the hardworking friend mentioned above in fact) and made brine and packed jars and put food by. To feed my family all through the year.

And there is something deeply satisfying in that work. At least when I shake off the overwhelmed sensation and connect with the spiritual side of my efforts.

Because be it one jar or ten thousand, putting food by feeds more than just our bodies. It's big work, but it's important work as well.

DSC_4203

~ * ~ * ~ * ~

In closing, this may be my favorite photo from the day.

The tidy and photogenic jar on the right was in the first round that went into the canner. The wild and messy jar on the left was in the fourth round. The jar on the left was filled when I reached the "Dear God, just let this be done!" phase of the project.

They'll both taste amazing, but filling that jar on the left took 1/10 the time. I think Mary would go for the messy jar, yet judge herself and being "lazy".

As for me, I'm not lazy. I'm wisely budgeting my energy.

Aesthetics be damned! The beans are done.

Hallelujah!

Love,

Rachel

Foolproof Canned Pickle Recipe

I feel some days like there is so much to share with you. So much going on. And yet, where to begin? Part of me wants to start by telling you about the rain that finally fell last night and how worried this drought has had me feeling. Part of me wants to tell you about the swimming hole we just discovered, the kale going wild in the garden, the farm we are contemplating, or the visit from my sister-in-law.

Part of me wants to share a variety of stories – some heavy on my heart and others warm in my soul – but then there is that bushel of cucumbers on the kitchen counter, demanding that I tend to it.

Produce is good that way. It keeps us in the now. So we'll start with pickles. Because the cucumbers just won't wait.

DSC_4118

How to Make Canned Pickles

If you have never canned before, pickles are a good place to start. They are simple, require few ingredients, and the product is outstanding. (Really. These will blow your mind.)

If you are interested I will share how to make live-fermented sour pickles next week. But for storage, canned pickles keep beautifully all year long.

DSC_4139

DSC_4130

DSC_4133

DSC_4117

Gather your supplies.

You will need:

A hot water bath canner. (I am using a pressure canner but not pressurizing it because it's all I have. We'll be hot water bath canning, which in a pinch can be done in a stock pot!)

Canning jars and lids. Check Craigslist and garage sales if you have the time or pick them up at the grocery or hardware store. My lids are Tattler lids because I am more comfortable with them as they are BPA-free but use what you have. Do remember that you need new metal lidsfor every batch. (Used rings, free of dents and rust are fine.)

Salt. Most recipes call for "canning salt" but mineral salt or sea salt works perfectly and provides minerals as well. Just stay away from salt with added iodine. Also know that if you use mineral salt you'll have some clouding in your jars (to which I say, "Who cares?").

Vinegar. While most recipes call for white vinegar I love apple cider vinegar for pickles. This time I did half of each since I was a little low on both. (I just refrained from making a joke about being "in a pickle becasue I was low on vinegar". Sorry. I couldn't resist.) The message is: use what you have. Any 5% acid vinegar will work.

Cucumbers, of course. You can pickle all manner of firm vegetables but we're starting with the basics. Cucumber pickles made by this recipe will become your addiction. We ate through a double batch of these by February last year, so I made a quadruple batch this time. I just hope they last.

DSC_4144

Prepare to Can!

Soak your cukes. Unless you just picked them moments ago, submerge your cucumbers in ice water to rehydrate them. You can soak them overnight or just for an hour. It's up to you. Your pickles will be better for it, but if you are in a time pinch don't fret – just skip to the next step.

Wash and sterilize your jars. Yeah, I hate washing clean jars too. If they are in my kitchen cabinet I don't bother but jars from the basement need a quick wash. Fill your canner with enough water to cover your jars. Bring to almost a simmer, then submerge your jars. Bring to a boil, turn off heat, and soak for a few minutes. Remove jars pouring water back into canner.

Sterilize your lids. Bring a small pot of water to boil. Remove from heat and add jar lids, gaskets (if applicable) and rings. Leave in hot water for now.

Cut off the blossom ends of your cucumbers. This is the end with the tiny belly button rather than the wider stem belly button. A friend and reader shared this tip with me last year. There are hormones in here that will soften your pickles over time, so cut that end off by 1/4 or 1/8 inch. Discard.

DSC_4121

DSC_4125

The Recipe: Viroqua Pickles

makes approximately 7 pints

4 lbs (or 1/4 bushel) of cucumbers, preferably small and firm

2 3/4 C vinegar

3 C water

1/4 C salt

7 cloves of garlic

peppercorns

1 bunch of dill

Process

Bring vinegar, water, and salt to a boil. While the brine heats place in each jar 1 clove of garlic, a pinch of peppercorns, and a few springs of dill.

Place whole small pickles or cut larger pickles in the jar. Be mindful to really pack them in, standing spears on end and wiggling as many in as possible.

When the brine comes to a boil pour over cucumbers, leaving 1/2 inch of head-space. (The neck of the jar is more than enough room.) Carefully wipe the rims of your jars with a clean dry cloth.

DSC_4129

DSC_4138

Drain the water off of your lids and rings. Lid the jars being mindful to not over tighten. (I tighten mine and then unscrew them just a touch.) Using canning tongs, lower the jars into the hot water. Add more water if necessary to cover jars with at least 1" of water or remove a bit if your pot is overfilled.

To prevent jar breakage, don't crank the heat! Lid the canner and set heat to medium-low. Allow to come to a simmer. This will take a while, maybe 10 or 20 minutes, depending on the batch.

When the water reaches a slow boil/heavy simmer set your timer. Simmer for 10 minutes for pints and 15 minutes for quarts. Check occasionally to ensure that it's still simmering. If you find it isn't simmering anymore adjust the heat and add a couple of minutes to your time.

DSC_4148

When the timer chimes, remove with tongs and set gently on a towel. Allow to sit undisturbed for one hour, then check your jars. For metal lids, just push down the center to test the seal. If the lid pops down your jar did not seal. Fridge it or attempt to reseal. To reseal, check rim for chips and lid for damages, then reprocess as above. To test the seal on Tattler lids carefully remove rings and gently lift lid. It will come off if the lid failed.

Your pickles are done! Bravo!

I saved the text above as a PDF for you to print out. Have fun with this. You are awesome and so are your pickles.

Viroqua Pickles PDF

Grain-Free Granola.

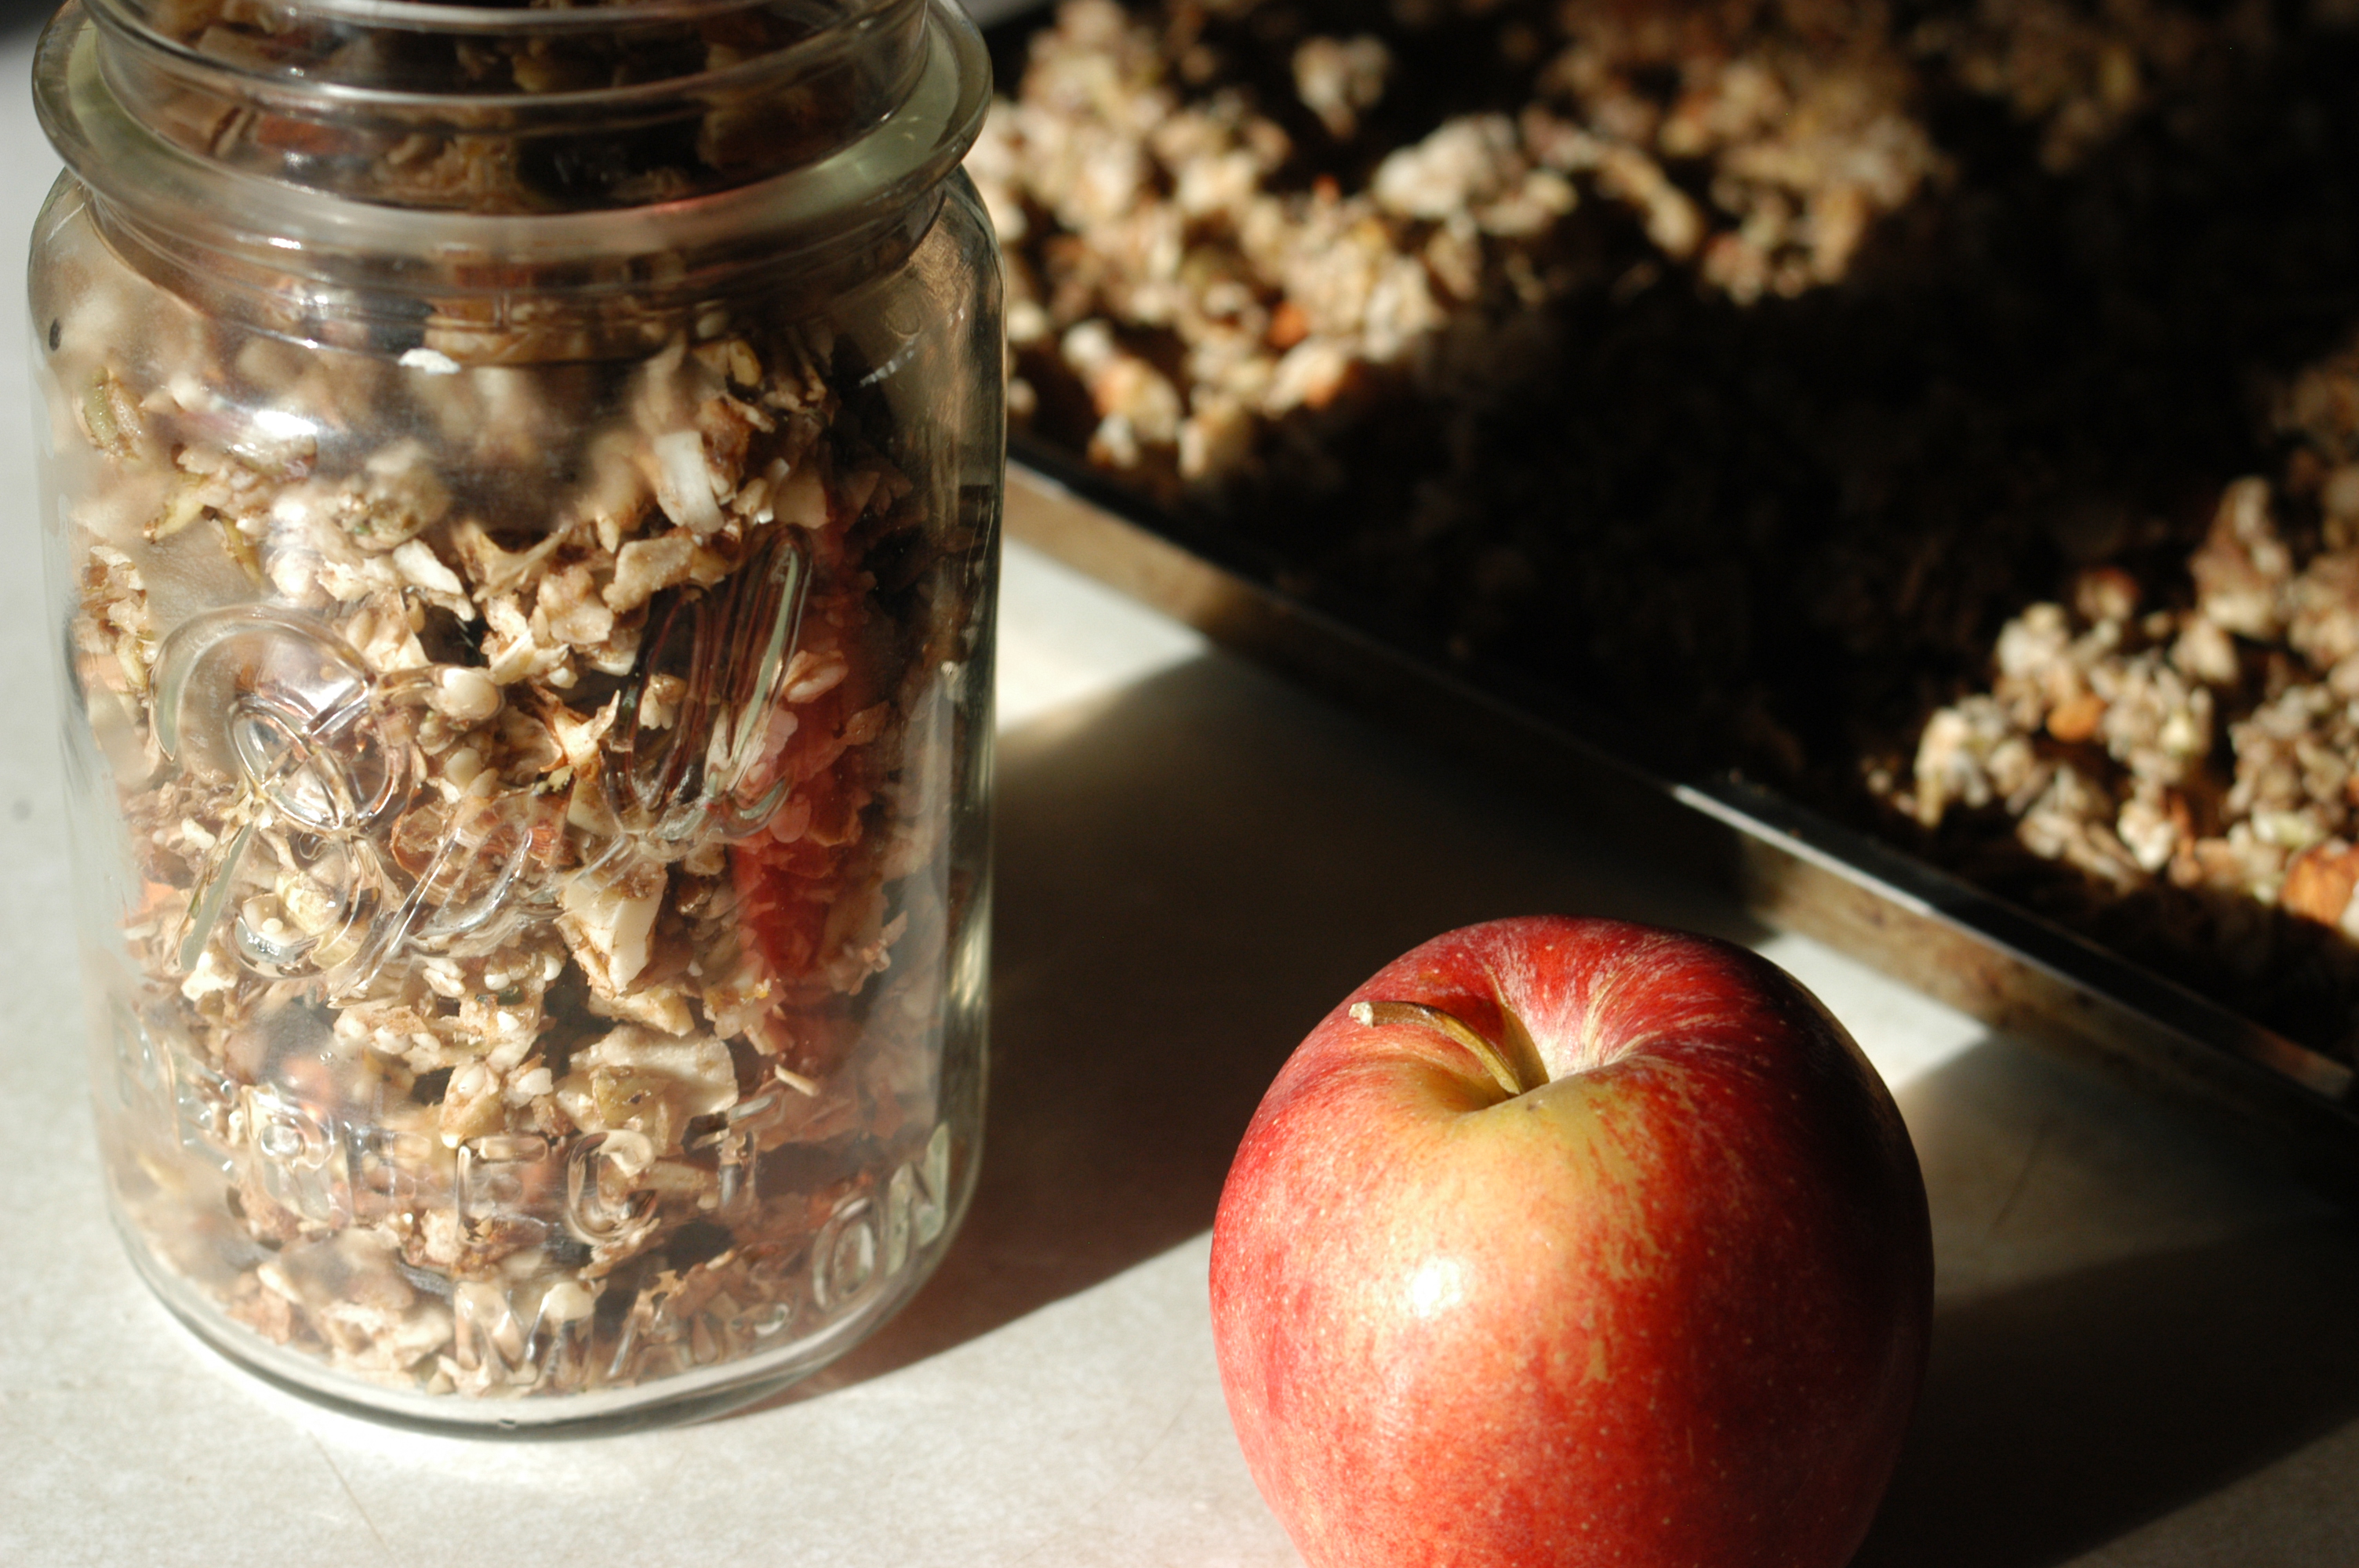
DSC_3185

DSC_3179

DSC_3188

This is the best granola of my life.

There. I said it. (Sorry Mom. Yours is awesome too.)

But this. This is life-changing.

Since cutting out most grains a couple of years ago, there are a few things I really miss. Popcorn was one. Grilled cheese another. And granola. Granola might be my favorite comfort food. It was hard to live withouth.

But a friend gave me the starting point for this recipe when we were on GAPS and I thought I died and went to heaven. Granola! Without the belly-ache!

I'm not sure who came up with the original recipe. It was one of those handed down friend to friend to friend deals. Over the years I've modified it heavily, so I think it's ready to share.

And besides. You need this. I just can't keep it to myself any longer.

Do go easy on this granola though, since it's mostly seeds and nuts and they are (in general) a food that our bodies have to work pretty hard to digest. Granola is a treat.

Also, the actual work-time of this recipe is short, but it takes a couple of days to go from nuts to granola, so plan ahead.

Grain-Free Granola

1 C pitted dates
1 large (or 2 small) apple cored and chopped (leave the peel on)
1/3 C honey or maple syrup (more or less to taste)
Juice of 1 lemon, lime, or orange
Zest of 1 lemon, lime, or orange
2 tsp salt
8 C assorted nuts and seeds (almonds, pecans, cashews, sunflower seeds, pumpkin seeds, sesame seeds, etc.)
2 C dessicated coconut
1 C fruit or vegetable pulp (from juicing, optional)
1 C hemp seeds (optional)

Begin by soaking your nuts and seeds in ample water and 2 TB sea salt. This helps reduce the amount of phytic acid in the nuts. Phytic acid, found in grains and nuts draws minerals from your body for digestion. Therefore soaking all grains (if you eat them) and nuts and seeds is key. (We really learned this while dealing with tooth decay for our daughter. Avoid eating lots of grains, seeds, and nuts if you are experiencing decay.)

You may want to soak the smaller seeds separatly as you'll need a mesh strainer for them. Otherwise toss them all in the same bowl.

Wait 24 hours day. (Or at least four hours. Four is good. Twenty-four is great.)

Soak dates in enough warm water to cover. Set aside and allow to soften.

Drain water off of nuts and rinse.

In a large mixing bowl combine nuts, seeds, coconut, citrus zest, and optional fruit and vegetable pulp and hemp seeds.

Strain soaking water off of dates. Reserve.

In your blender combine cored, chopped apple with citrus juice, honey or maple, and soaked dates. Add enough date water to make it easier to blend. Puree.

Pour your sweet and sassy syrup over nut and seed mixture. Stir with your hands, then lick off your fingers on your way to the sink. It's messy. But heavenly.

Dehydrate in your food dehydrator for approximately 12 hours or until completely dry. (No dehydrator? No worries! Spread on cookie sheets and bake at the lowest possible temperature in your oven. Stir occasionally to ensure thorough drying.)

I have yet to make this and not have my family snitch a good 30% of it right out of the dehydrator before it's even done. Plan on the same. The whole house will smell like heaven during the dehydrating and it's irresistible. Forgive them.

Grain-Free Granola is amazing on yogurt of with the milk of your choice. Also good out of hand as a snack.

Store in air-tight jars in the refrigerator or freezer.

DSC_3172