
I have a confession to make.
In a previous life (back when I was 20-something vegetarian college student) I remember standing in the beans/canned goods isle at the grocery store. I was comparing a can of organic black beans to a can of conventional. I was at a cross-roads where organic food (a new concept to me) had begun to make sense. But in that moment I backed away from that turning point because of price.
I bought the conventional.
And I continued to do so for another five years.

Back then (in 1996) it was something like $1.45 for a 15 oz. can of organic canned beans, but conventional would run you only 67 cents. It never occurred to me that if I made black beans from scratch I could have eaten organic for far less than I was paying to eat conventional.
Wait, wait. That needs a bigger font.
It never occurred to me that if I made black beans from scratch I could have eaten organic for far less than I was paying to eat conventional.
Because in my mind I was simply buying food. Not processed food, just food.
But (surprise!) beans don't grow in cans. It's true. And therefore they were indeed, well, processed.
And anytime you buy processed, convenience, or packaged foods you not only pay more at the store but you also often compromise quality, flavor, and ingredients.
But let's stick with price.
I checked my local food coop just yesterday and dry, organic black beans are currently $2.69 per pound. (If I picked them up through our buying club I'd pay even less.) So let's do a little math, just for fun. (We're homeschoolers, after all. It's what we do.)
If 1 lb black beans = 2 cups;
and 1 15 oz can black beans (purchased) = 1/2 c dry beans (or 1/4 lb);
then 15 oz of homemade black beans (the equivalent of one can from the grocery store) is – wait for it – 67 cents.
Remember that can of conventional beans I bought back in 1996? Yep. Same price, except now it's 20 years later. And they're organic.
Meaning: you can eat organic home-canned black beans in 2016 for the same price as purchased conventional canned black beans in 1996.
Let's pause for a moment and let that sink in, shall we?
.
.
.
I know. Seriously.

And by canning beans at home not only am I ready for spur-of-the-moment meals, but I can control the ingredients. As in: these are packed with cumin and garlic and cooked in bone broth, and my can's aren't lined with BPA.
And this whole project took very little time, yet put nine pints of beans on my pantry shelf. Winning!
Ready to triumph over your pressure canning fears and save buckets of money on your grocery bills? Darn right, you are.
Here's how.
How to Pressure Can Dry Beans
(red, black, white, kidney, garbanzo, or otherwise)
Makes 9 pints
Recipe can be doubled or halved easily. I shoot for around 3 lbs (9 pints) due to the size of my canner. Adjust as needed for yours.
Ingredients
3 lb dry beans
3 Tb whey or apple cider vinegar (ACV)
5 quarts homemade bone broth (highly recommended) or purchased broth or water
9 large or 20 small cloves of garlic, sliced or crushed
4 Tb ground cumin
kombu seaweed, 1 small piece per jar (optional)
Process
Soak beans for 24 hours (or at least overnight) in enough water to cover the top of the beans by at least 3". Stir in whey or ACV.
After 24 hours drain off soaking water and rinse.
Place beans in a large cooking pot with garlic, cumin, and enough bone broth to cover beans by 2".
Bring to a boil, reduce to a simmer, and cover. Cook for 30 minutes and remove from heat. (Your beans will still be hard and inedible. They are supposed to be. The cooking will be completed in the canner and you won't have mushy beans.
While the beans cook wash your jars in hot soapy water to pre-warm them. Rinse and drain. Prepare your jar lids according to manufacturer instructions.
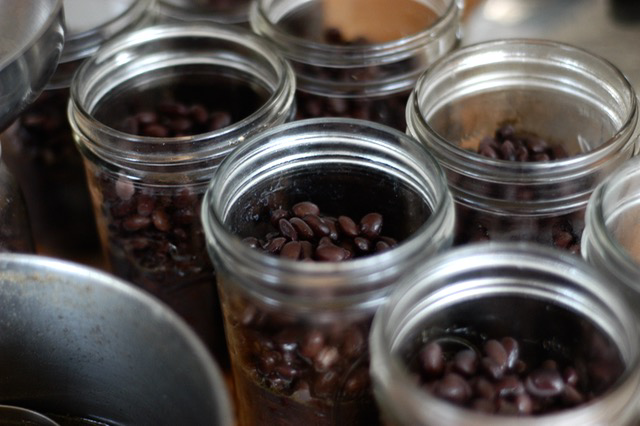
Fill your jars. To ensure that I get the right proportions of beans to broth I strain my beans out of the bean cooking broth with a ladle and divide them among my jars as show below. Then I top off with the seasoned bean cooking water, dividing it evenly between all jars. If needed add additional broth or water to fill jars to 1" below rim. Add a small piece of kombu to each jar if using. (1" x 2" is adequate.)
Dip a cotton cloth or paper towel in white vinegar and wipe the rim of your jars. This will ensure a clean rim and a good seal. You can also use water but I'm partial to the vinegar trick.
Top your jars with lids and screw on rings "finger tight". (If you are unsure how tight that is simply tighten the rings fully, the loosen approximately 1/2".

Meanwhile, heat approximately 3" – 4" of water in your pressure canner. (Unlike a water bath canner you don't submerge your jars fully in a pressure canner. The steam pressure does the work this time, not the simmering water.) Add a splash of vinegar if you have hard water to prevent minerals from coating the outside of your jars.
When your jars are lidded and the canner is simmering, it's time to load up! Affix the lid on your canner but don't engage your weight yet.
Watch your canner. When a plume of steam escapes from the valve set a timer for 10 minutes. Keep the heat on under your canner. (Waiting for the steam plume to start in earnest can take an additional 5 – 15 minutes.)
When your timer goes off it's time to apply the pressure! Set your weight to 10 lbs of pressure. Keep the heat on and when the weight begins to rattle set your timer. How long you maintain pressure depends on your jar sizes:
Quarts: 1 and 1/2 hours
Pints: 75 minutes
I always adjust the heat so that my weight is rattling on and off every twenty seconds or so rather than a constant rattle that makes me think my pressure canner might explode at any moment. You don't want long gaps between rattles, but five to thirty seconds is great.)
When your timer goes off turn off the burner. Don't you open the canner! Don't even try. And don't quick-cool the lid by draping a damp towel over it. Just leave it be. Seriously. Otherwise you're fixing for an exploding broth disaster. For. Real. Leave the weight in place as well.
Allow your canner to cool for 45 minutes or more, then remove the weight and carefully remove the lid

Use a jar lifted to carefully remove your jars and place them on a towel to cool.
If you are using Tattler BPA-free lids, then using a hot pad for each hand, tighten your rings and allow the jars to cool for four hours. If you are using regular lids, simply remove and leave the lids be.
After four hours check that your lids have sealed by pushing down on the center of the lid. If the lid is sucked down it is sealed. If not transfer to the fridge and use within a week or transfer to wide-mouth pints filled 3/4 full and freeze.
Allow the sealed jars to sit undisturbed for 12 hours.
After 12 hours remove rings, double-check that the lids are tightly sealed, label and transfer to your pantry.
I have been contemplating canning more and more as time goes on and I see that prices for canned goods (not to mention the fact that they’re in aluminium cans) are insane for everyday use. Unfortunately, I no longer live in the US where canning supplies are readily available and cheap. I’m saving ALL the glass jars I buy on the regular (jam, mostly) and saving them for these recipes. Thank you for sharing!
-Rachel (Ireland)
I had no idea canning jars were not readily available in Ireland! How interesting. Freezing is a decent option as well (if you have the space for it). Good luck!
I want to pressure can but honestly…it scares me. I have done a little water bath canning in the past but this year I am upping my game. Less food in the freezer is the best way for us I think. Depending on electricity is a roulette game. Thanks for the recipe and walk through on canning beans. It may be my first project!
I’ve only seen a pressure canner once and it looked pretty intimidating; however, I would like to try pressure canning. What type of canner do you have or what type or brand would you recommend?
We can ours with jalapeños and have ready to go nacho/quesadilla toppings! Yum!
Can you get conventional jar lids without bpa in them??
All the cozy beans look fabulous! One note, do NOT tighten the lids after processing. This can break the seal and let the beasties in to spoil all your hard work. Tighten the lids until they catch before processing. The gasket material on the lids is designed to soften sufficiently to provide an air-tight seal and maintain a vacuum in the jar when in contact with the jar rim. The ring just holds the lid in place during processing, as the jars cool the vacuum forms and that satisfying “ping” let’s you know your jar is sealed.
Why the kombu seaweed, Rachel? Curious about how that might change the flavor of the beans, and what the benefits are. Lived in Japan for 4 years, and did not care for the strong flavor and texture of kombu in dishes where it was the main event, but a little seasoned in beans might be nice . . . Thanks!
Kombu is added to make the beans more digestible. In small amounts I find it doesn’t change the flavor.
Thanks, Jen!
New lids and also Tattler lids are BPA-free.
Sounds fabulous!
I inherited my grandmother’s canner. It has a dial (rather than a weight). I’m sorry I don’t have more specifics for you!
The more you do it the less scary it becomes. I was still a bit nervous about it last year but now it’s second nature to me.
In Ireland and in Northern Ireland you can get canning jars called Kilner, they are our equivalent of Ball jars/Mason Jars. Most homeware stores and hardware stores keep them. Bet of luck with your canning adventures this side of the pond xx