Wet Felting Little Vessels.

DSC_6658

Sometimes when our day is mellow I just pull out some craft books and start flipping through them, conspicuously, waiting for the kids to notice. I did this yesterday with a wool felt project book and within seconds I had a kid on each knee, excitedly planning their next craft project.

We came upon some wet felted pouches and boxes and my kids flipped. "Let's make some!" Since I try to approach homeschooling from a say-yes-as-often-as-possible perspective, we gathered our supplies right away and headed outside.

Wet felting is a great project for basements or backyards, because it tends to be messy in a soapy-water-everywhere sort of way. We each made a little box or bag yesterday in just under an hour out on the deck in the last of our summer sunshine. Perfect.

DSC_6637

Before wet felting…

DSC_6655

… and after.

Wet felting results in a smooth, hard fabric where you began with a soft cloud of wool. We love wet felting. With the help of an adult, even a toddler can participate in the process. Here is how we did it:

DSC_6636

DSC_6639

DSC_6632

1. Gather your supplies: wool roving, 100% wool yarn, a bowl of hot water with a bit of soap mixed in, a bowl of ice water, some smooth stones or marbles, and bubble wrap or a washboard. (Disturbingly dirty fingernails are optional.)

2. Wrap marbles and stones with wool roving. Go for three to four thin layers. Tie with wool yarn and tuck each bundle into a small cotton sock or a bandanna tied with yarn.  

3. Dip your bundle into the hot water (as hot as little hands can stand to be in). Squeeze. And squeeze. And squeeze. For 3 minutes or so. Re-dip in the hot water occasionally if the little hands are feeling bored and keep squeezing. (We made up some squeezing and water songs to make this process more enjoyable. They were pretty dorky, but they did the trick to keep Lupine on task.)

4. Dip into hot one more time, squeeze well, then dip into the cold. You will feel the wool begin to firm up a bit under the sock. Alternate hot and cold, squeezing well or rolling between hands for several minutes between each dip. The felting process is a result of both friction and the hot-cold contrast, so keep them both going.

5. Peek. Carefully peel back the sock. Is the wool beginning to tighten up around the stone? Great! You can leave the sock in place or remove it now. It is up to you. If your wool is still very loose, leave the sock in place and repeat process above for five more minutes.

DSC_6642

DSC_6643

DSC_6646

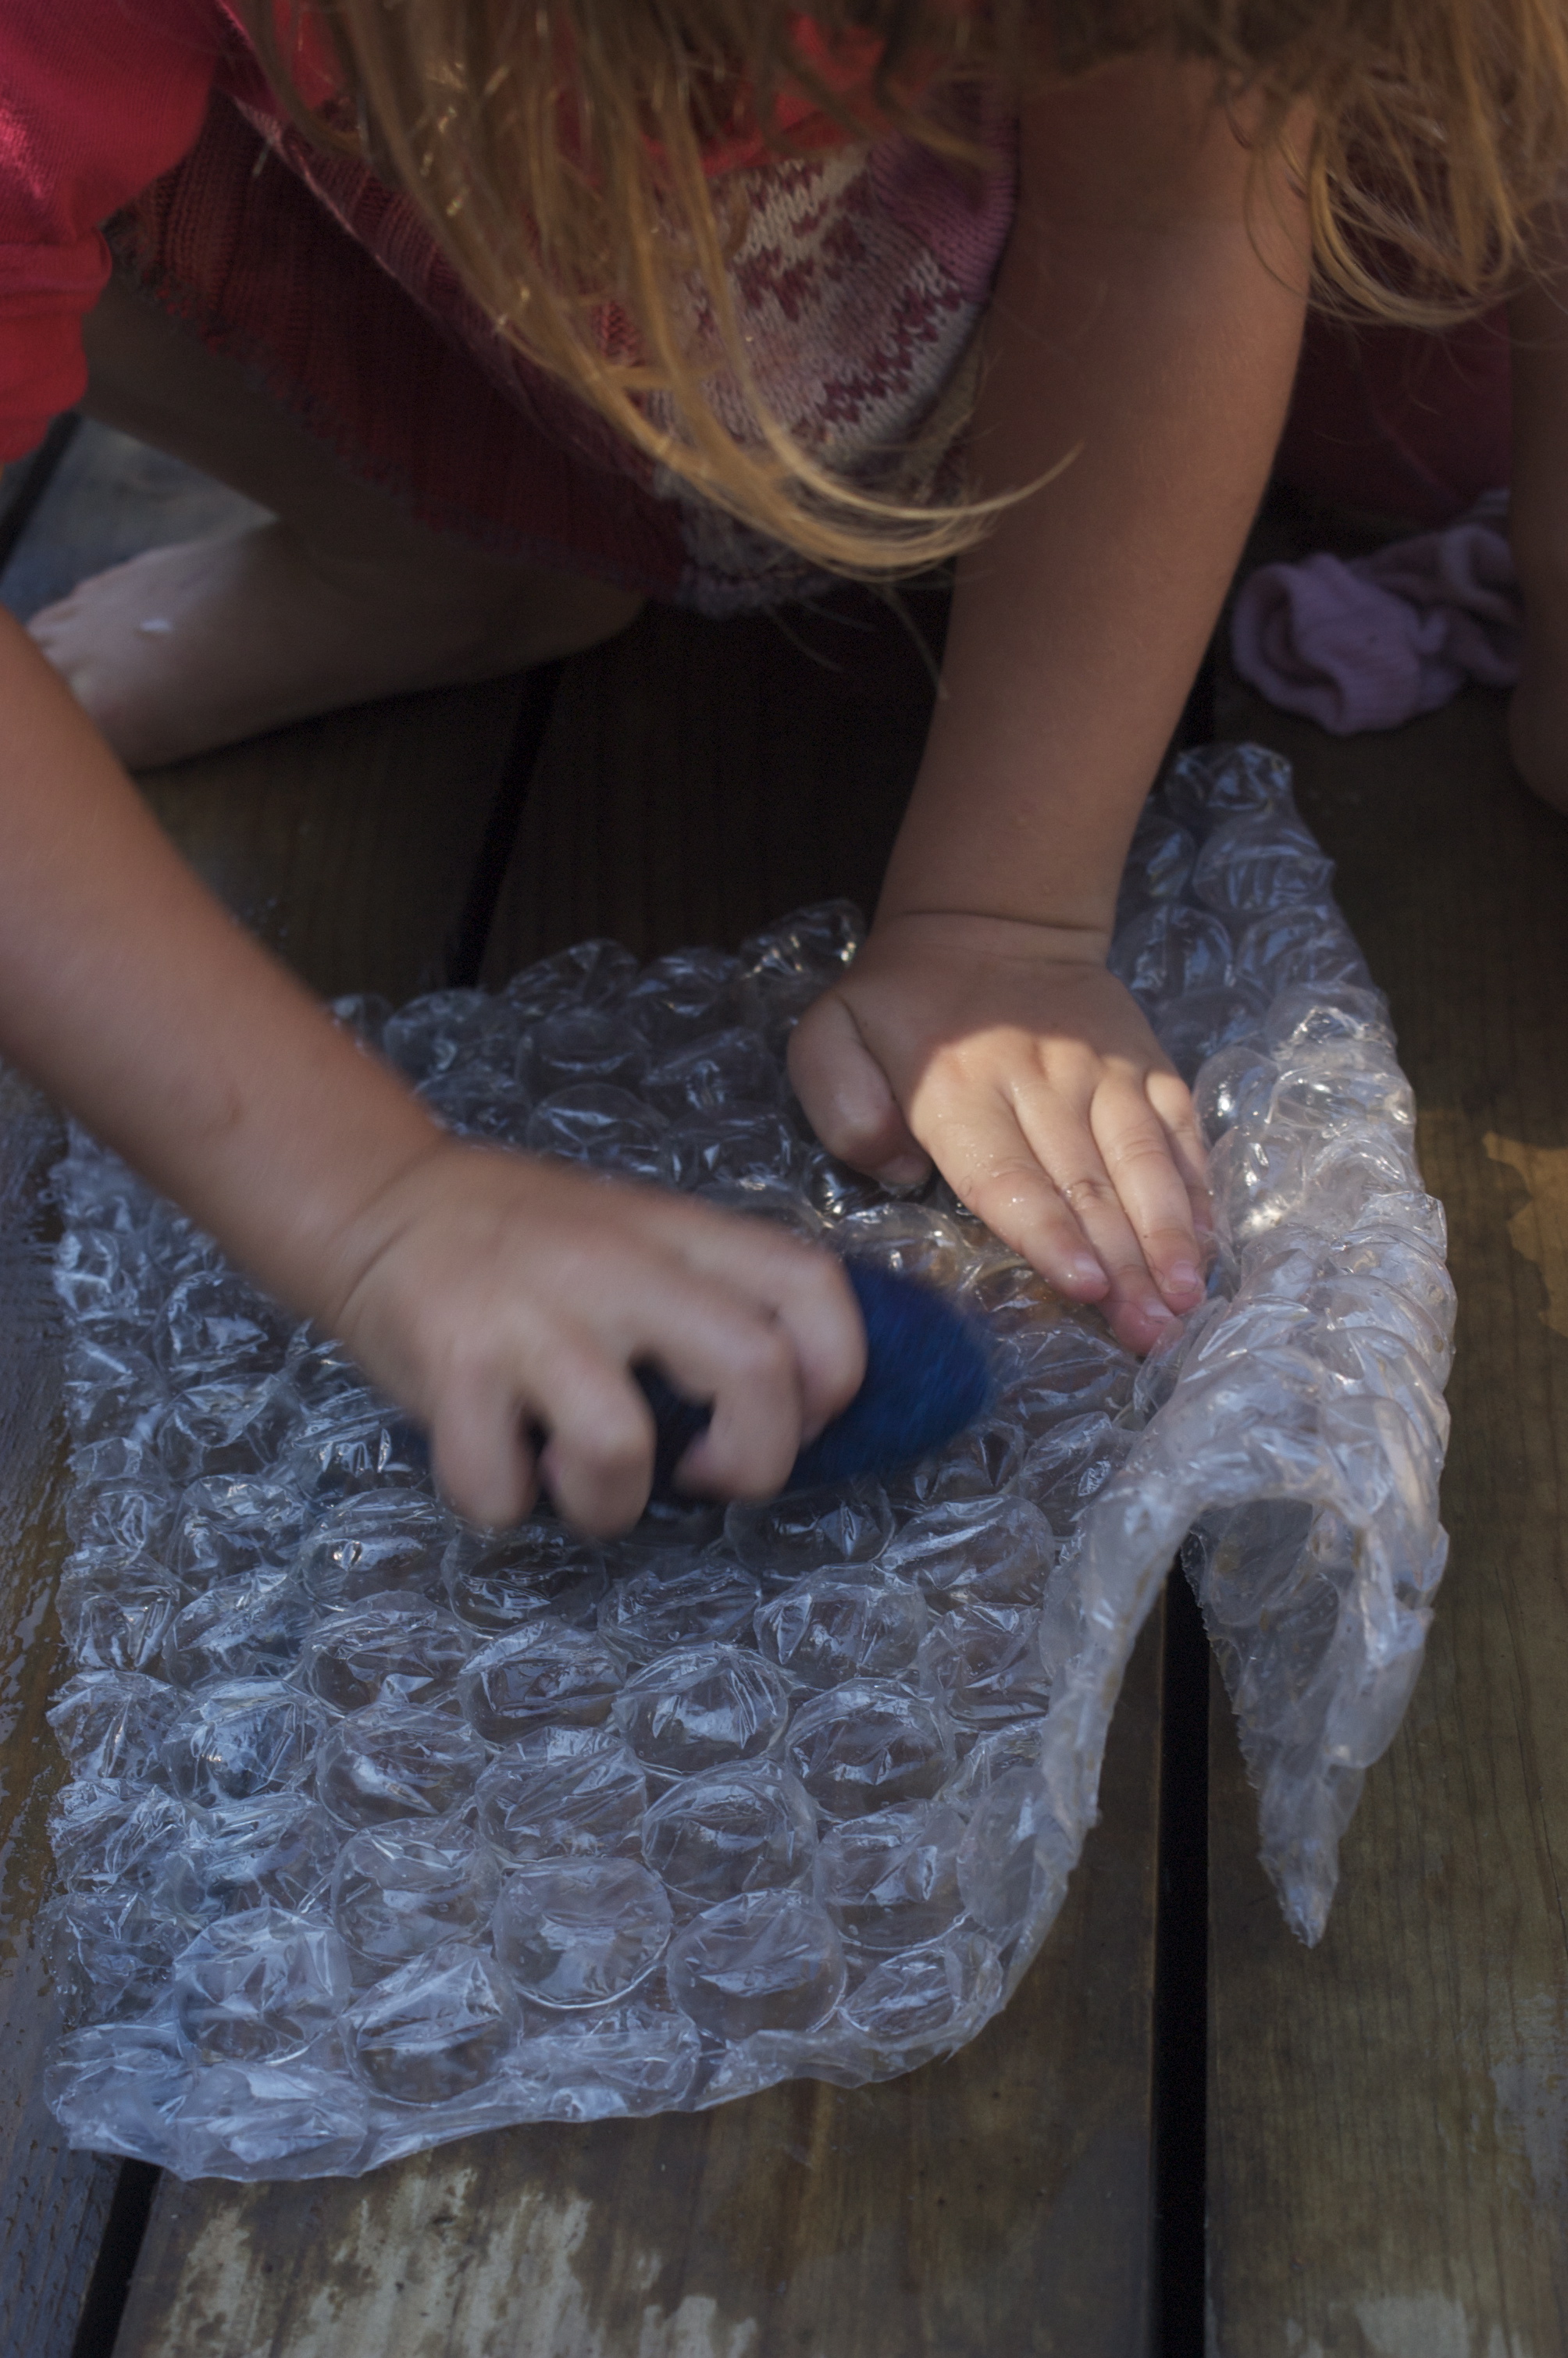
6. Begin rubbing your wool on the bubble wrap or washboard (with our without the sock). The more you rub, the more it felts! This is the moment you'll begin to realize that yes, it really is working! Keep alternating hot and cold water, but now rubbing vigorously on the bubble wrap. You can also roll your wool up in the bubble wrap and roll it around on the table or ground.

DSC_6650

DSC_6652

DSC_6647

7. When the wool feels firm and hard around the stone the felting is complete! Allow to dry completely (if your kids possess remarkable patience), or if you prefer (and like me lack any patience beyond that required to wet felt) open right away.

8. To open, use a utility knife or razor blade. Carefully slice open the vessel where you want the opening to be. Remove stone and allow to dry. Now you can add a string (to make a necklace) or a button and loop for a closing box, or tuck a wee felt baby into her little bed.

Beautiful!

DSC_6656

Good Morning! (The knitting and canning report.)

DSC_5838

DSC_5832

DSC_5835

DSC_5837

DSC_5840


DSC_5842

I couldn't wait. Between canning a couple of small batches of jam, Lupine and I hopped on our bikes and headed to our local yarn shop on Saturday in search of some black wool that was softer than what I had in my stash. My girl needs a sweater. Now. I have four sweaters to knit in the coming months, and I figured hers would be the smallest and fastest so she's up first.

Instead of black Lupine found a dusty aqua with silver sparkles. Can you see the sparkles? It is, in her words, "As soft as a fairy" and, um, sparkly so I know she'll love it. I've been knitting with passion for the past two days and loving this transition into cooler days.

Having a fresh project on the needles is so motivating. I am stealing moments throughout the day to knit a few rows (or stitches) as I can.

DSC_5849

And yes, canning is still happening nearly every day in the kitchen, and my garden is winding down for the season. The jams above are ground cherry, or husk cherry. Lupine and I made two batches while Sage was away – one with chamomile and vanilla and one with orange and ginger. I look forward to opening these shining jars some dark and cold winter morning!

What's on your needles and happening in your kitchen?

Making Paper-Mâché Easter Eggs.

So judging by the links and emails and comments you absolutely loved the wool felt Easter egg tutorial! I'm so glad. They really are easy to make – with any sewing experience or skill level. I know many of you are making them already and I wanted to remind you of the LuSa Organics/Clean. flickr photo pool. Share your projects there, won't you?

DSC_1654

And yes, at long last, the paper-mâché egg tutorial is finally here! Thanks for your patience while I've spent all of my free time in the garden. Yesterday I pulled out my craft supplies with determination and took them, yes, out into the garden. There in the sunshine and the breeze the kids and I made nearly a dozen refillable eggs. It was good, messy, spring fun.

As an attempt at simplicity I have broken the process down into Phase 1: Make Your Eggs; Phase 2: Open (and Close); Phase 3: Add Some Bling. It will all make sense as we move through the process.  

Before we get started, one thought on planning for time: because of necesity to dry thorougly between steps this is a project that needs to be completed in phases over a couple of days. No phase take exceptionally long, but drying time is necessary between steps. Plan for it!

DSC_2834

Phase 1: Make Your Eggs

1. Gather your supplies

  • Wooden or plastic eggs or water balloons (I used the few plastic Easter eggs left in our world, but be creative. Even a racket ball would work to create round "eggs".)
  • Newsprint or other flexible scrap paper
  • paper-mâché paste (recipes below)
  • Something oily (coconut oil, Booty Balm, petroleum jelly, anything.)
  • Empty egg carton
  • Wet and dry rags for wiping hands
  • Colored issue paper (optional)
  • Scraps of decorative paper (optional)

2. Make your paper-mâché paste. Two options are below. Both work well.

Paper-mâché Glue Recipe

  • 2 parts white glue
  • 1 part water

Combine ingredients. Ta da! Easy.

Paper-mâché Wheat Recipe

  • 1/2 C white wheat flour
  • 2 1/2 C water

Combine and boil for three minutes. Cool until comfortable to the touch.

3. Tear newspaper into thin strips. The thinner the better, but it works with wider kid-torn strips too.

4. Lightly oil the outside of your plastic or wooden eggs. This will make removing the paper-mâché easier in Phase 2.

5. Dip strips of paper into paper-mâché, squeegee off with your fingers, and begin wrapping the eggs. Wrap and wrap and wrap some more until there is no plastic or wooden egg peeking out and the entire egg is covered in at least two layers. (We have some covered a with a dozen strips and some covered with three. I'd suggest shooting for the 3-6 layer zone. It will make the egg easy to work with in phases 2 and 3 but sturdy for Phase Egg Hunt.)

DSC_2838

DSC_2851

DSC_2859

6. After you are pleased with the amount of coverage roll the egg in your hands to smooth out the bits of paper that are poking out. Roll and roll around in your hands "just like you're washing up with soap," says Lupine. As the photo above will testify, you will get all gooey and need to wash up with some real soap very soon.

7. If you are covering your eggs with tissue or decorative paper, now is the time. Because the tissue is so thin there is no need to dip in the paste. Simply stick to the already moist egg. Cover first with a couple of layers of white tissue and then colored. (The white will hide the printing on the newspaper. Decorative paper can be applied directly on top of newspaper as it is opaque.) If needed, dip your fingers in the paper-mâché paste and smooth a little on the outside of the tissue paper to help it stick smoothly.

DSC_2856

DSC_2866

8. When you are satisfied with your egg wipe off any excess paste with your hand and place completed eggs in an empty egg carton. As they dry move them around now and then to be sure they aren't sticking to the carton. 

9. Wash up. You're a mess. But it was fun, right? Phase 1 is complete.

DSC_2868

Phase 2: Open (and Close)

Did you let your eggs dry thoroughly? You should. It is much easier to do step 2 with completely dry eggs. I hurried the process a bit to bring you this tutorial today (and only two days late), but in a perfect world I would have let the eggs dry longer. Just sayin'.

1. Gather your supplies.

  • empty toilet paper tube or other thin cardboard
  • Utility or craft knife
  • Tacky or white glue
  • clothespins (spring type)
  • Decorative ribbon

DSC_2879

2. Carefully slice into the (completely dry) paper-mâché around the equator of your egg. (I like to leave a 1/2" section uncut so that my egg has a hinged lid.) Look for any areas where you did not completely cut through the paper and cut again. Gently Squeeze the egg and the paper-mâché should slip apart at the slice you just made, revealing the wooden or plastic egg beneath. (Note: if you used a balloon cut your equator line knowing that you will pop your balloon.)

DSC_2880

3. Gently squeeze the egg more firmly until you can grab hold of the top half of your paper egg and remove it. Then grab that slippery egg from inside and pull it out. It will be greasy and cold and feel kind of icky but whatever. It's just a fake egg. And there it is. Your homemade paper-mâché egg! Satisfying, isn't it?

 DSC_2884

4. Using scissors or your craft knife, cut your toilet paper tube down its length and open. Cut a slice from one end, approximately 1/2" or 1 cm wide. Apply a narrow band of glue inside the bottom half of your egg and insert the cardboard strip. Leave 1/2 of it peeking up above the edge.

Note: depending on the size of your plastic or wooden egg there will likely be either a gap or an overlap of this cardboard band. Both are fine. Just angle the cardboard edge so that it narrows as it comes out of the egg a bit rather than becomes more wide than the egg opening. The cardboard will give the top of the egg something to grab onto and will help your eggs stay closed. If it flares out it will prevent the egg from closing at all.

Pinch the edges of the egg and band with clothespins to hold it in place until the glue is dry.

Phase 2. Done. Voila.

DSC_2885

Phase 3: Add Some Bling (mostly optional)

Personally I think even the newsprint eggs are awesome, as are the plain kraft paper ones pictured at the top and bottom of this post. But if you want to add some fancy to your eggs this is the time. (Wait until the glue from Phase 2 is dry inside of your egg before proceeding.)

1. Gather your supplies

  • Ribbon
  • Paint (optional)
  • Glitter (optional)
  • Glue or Mod Podge (optional)
  • Decorative paper (optional)

2. Paint, glitter, and glue your egg, inside and out. Be as wild or as mild as you are. Allow your embellishments to dry completely perched in an empty egg carton. If desired coat the entire outside of your egg with outdoor Mod Podge. I didn't do this but if your eggs will be out in the rain it isn't a bad idea.

DSC_2886

3. After the egg is thorougly dry attach the ribbon. The ribbon will also help insure that your egg remains closed during your egg hunt or when tucked in a spring basket. On the "back" of your egg (this is arbitrary unless you left a bit of paper-mâché connecting the top and bottom) attach a 12" – 18" length of ribbon with tacky glue to the bottom half of the egg near the opening. Allow to dry.

Your eggs are ready to use! Hide a treat inside (I shared some ideas over here last week), tie your bow, and hide the eggs. Note: If your ribbon (like mine below) was cut a little short it will still work. Simply tie a loose knot rather than a bow to close your egg.

DSC_2889

DSC_1653

DSC_2875

P.S. I also shared a wool felt egg tutorial and a simplified spring basket post last week to take your spring celebration to a whole different (gentle, natural, wholesome) level. Happy Easter/Eostar/Spring to your families! ~ Rachel

Felt Easter Egg Tutorial.

 DSC_2730

When Sage was small I thrifted a big bag of plastic easter eggs. I was happy to have something to hide treats in during our spring celebration (and happy to have not purchased them new) but always felt a slight disconnect when I pulled them out each year. They were a little hiccup in our sweet, natural holiday – a bright plastic spot in our woolen and wooden and otherwise earthy spring baskets.

Five springs later I started wondering: could I make a natural replacement for plastic eggs? They would need to be outdoor-friendly and made to contain a tiny treat. I thought about these for weeks last spring until I had an aha! moment and realized how to make them.

Felt Easter Eggs are quick, cute, and infinately reusable. As a bonus the wool felt will stick to tree trunks so you can hide your treats in some unconventional locations! (Cudos to my sister, Titi for this brilliant discovery.) And if you sew with cotton thread and use 100% wool felt any you miss will biodegrade. What more can you ask for?

Felt Easter Egg Tutorial

Materials:

  • Small scraps of wool felt
  • Contrasting thread
  • Hand sewing needle or sewing machine
  • Buttons, gems, or other embellishments (optional)

DSC_2722

Step 1: Cut out two egg shapes for each woolen egg. Mine are just larger than a chicken egg, approximately 2 1/2" x 3". Cut with a pinking shears or straight shears. The choice is yours. Trim the egg you would like on top to be 1/8" smaller than the bottom egg.

Step 2: Cut an opening 1/3 of the way down from the point of the egg. (Cut the top egg only.) I love the look of a "cracked egg" with a zig-zagging line, but a round hole, an "H" shape, or curvy line works as well. (Do not cut simply a straight line as it can be difficult to get a treat inside without tearing the felt.)

Step 3: Choose yoru embellishments. Mine are wool but we love buttons and any thing sparkly. Especially the sparkly.

DSC_2727

Step 4: Set aside the bottom egg. Sew embellishments to the top egg by hand or machine. (My blue flower hides a curvey opening in the yellow egg.)

Step 5: Carefully place the top egg over the bottom egg. Using a contrasting thread, zig-zag or decorative stitch the entire perimiter. Backstitch at the end of your seam.

DSC_2729

Your egg is done! You can easily make enough for a backyard egg hunt in an evening. With practice mine took less than five mintues each.

Last spring we kept our felt eggs a secret until our egg hunt was on and the kids were amazed at the woolen eggs that they found. Gentle spring magic, indeed. 

~ * ~ * ~ * ~

Check back tomorrow and Monday for handmade paper-mâché easter eggs (another sweet plastic-alternative for your spring celebration) and ideas for simple, natural gifts for your spring baskets! (Or for daily updates follow Clean. on Facebook.)

Love,
Rachel

DSC_2732

Easy Tutu Tutorial.

DSC_1848

A little note before my post: I apologize for everyone who has been unable to comment for the past week! (I wondered why most of you were so quiet.) I didn't realize that a setting had changed that required you to sign in to Facebook or Typepad to leave a comment. Thanks to several emails and one neighborly phone call, the problem is fixed, so comment away. I missed your notes so much!

All right. On with our previously scheduled craftiness.

DSC_1889

Today we are off to a birthday party for a sweet little friend who is turning seven. Seven is an especially magical birthday as children enter the Seven Year Change, a remarkable transition from the early childhood of creative play to the older child's life of focus and work. Seven is big.

After we were invited the kids and I tossed around dozens of ideas of handmade gifts. Headbands and dolls were at the top of the list (though Sage kept suggesting we give her a Concord Jet. Don't ask. I have no idea.) and I was pulling for homemade hair ties (like the old school plastic ball ponytail holders, but made of rainbow wool roving needle felted onto the band) or perhaps a sewing kit (a repurposed metal tin stocked with fabric, needles, thread, and all the supplies needed for a child's hand-sewing projects).

But I was voted down, and headbands it was.

When we opened the fabric cupboard to choose our fabric Lupine spied a pile of tulle we have had in our stash forever. "A tutu!" She cried, laughing hysterically. I started laughing too, grateful to have a reason to laugh even if I wasn't sure what it was. The more laughter the better these days. Bring it.

So we laughed for a while and then decided that, yes, a tutu was way more fun than a headband. So we played parachute with tulle in our big family bed (random silliness is always a good idea too) and then we set to work.

DSC_1835

A more straightforward project would be hard to come by. Skip the waistband and you could finish this project in 1/2 hour. It is flexible, so use what you have or look up a more step-by-step tutorial on-line. There are dozens out there.

Here is how we did it, in standard Rachel-Loosey-Goosey style:

With a rotary cutter and cutting mat we made 2" wide strips out of all of the tulle. It was a huge pile, but I did not measure the yardage. Six? Eight? Some such. We cut the strips twice as long as we wanted the tutu to be which happened to be the width of our yardage. The strips, when doubled over are approximately 2.5 feet long. I wanted the skirt to be long as it is for an older child.

DSC_1846

I cut a long piece of elastic (to make the looping easier for Lupine) and knotted the ends together. Then we looped the tulle strips over the band. (To do this, start with the middle of the strip, lay it over the elastic, wrap the tails under the elastic and pull the tails through the hole. Slipknot!) Repeat in a random color assortment or a regular pattern, as shown below. I looped, Lupine pulled – over and over and over…

DSC_1840

DSC_1841

We looped the tulle until we ran out. (*Be sure to bite the elastic once in a while and peek through the fabric. That breaks up any monotony you might be feeling.) In all the looping took less than 1/2 hour.

Then for the sake of comfort I sewed on a waistband. (I hate the idea of a scratchy waist on a tutu. That does not inspire dancing or making fairy magic in my opinion.) I made a big wide pieces of bias tape from some cotton, twice the length of the child's waist. (I picked a lovely polka dot. Lupine picked gaudy stars. Since she was the one invited to the party she trumped me.) The final tape was 1 1/2 inches wide.

DSC_1884

I schooched the tulle loops down towards one end of the elastic, spacing them sort of evenly and then pinned carefully sandwiching the looped ends of the tulle and the elastic inside the tape. I stitched along the edge being careful not to catch the elastic in the stitches. (Only once did I have to rip the whole thing out because those sneaky tails were crawling under my presser foot, uninvited. So watch out for that.)

Then I pulled the elastic tails and the whole waistband bunched up like a huge hair scrunchie. I stitched the elastic ends together and trimmed, then slid one end of the waistband into the other and sewed them together.

DSC_1886

It turned out pretty darn sweet in my opinion, especially for such a quick project. If you think you don't have time to craft, wouldn't buying a gift have taken more than 20 minutes? Homemade is often imperfect, but we're not talking about a wedding dress. It's a tutu. For a child. Imperfect is perfect.

Really, what's not to love about a sparkly homemade tutu?

So we are off to the birthday party! Since homemade pizzas are on the menu we'll bring our own pizza crusts (made of hazelnut flour), and before bed I made another key lime pie to bring and share. That one is a sure winner with my little ones. Um, and me. Because along with the laughter and random sillyness, sweets are seeming pretty important right now, too.

Thinking happy tutu-clad thought today.

Love,

Rachel

Kid Craft: Homemade Pipecleaner Gnomes and Fairies.

 Rarely a day passes at our house that we don't make a glorious mess of one kind or another, creating. The kids and I sit together at our dining room table, mountains of wool felt, embroidery floss, and wood turnings before us.

Monday was a gnome and fairy kind of day.

DSC_1373

DSC_1415

DSC_1349

The process was simple. In fact Sage created his little gnome with almost no assistance. Lupine called out the requirements of her fairy, helped me cut and sew, and fashioned her own wings.

Usually these projects are about the process, not the end product that we create. Often what we make is soon set aside or becomes a decoration in the children's rooms or a gift for a friend. But this craft it was different. The little companions we made have been in constant use since their "birth" – even carried along on errands and trips and tucked in to bed on the children's night stands.

DSC_1361

DSC_1390

DSC_1403

DSC_1417

Indeed, the magic really happened after the work of making the wee friends was finished – when the play began.

More wooden bits were brought out to be bread, plates, crystals, chairs, tables, root beer barrels, butter churns, and honey pots. Bits of silk, fabric and leather created beds, blankets, the land and the sea. They played and played for hours together and alone, creating their magical world. And the fairy house I shared with you last week has been in nearly constant play.

DSC_1405

DSC_1385

DSC_1392

DSC_1352

DSC_1355

The children write their story throught this play. Sage's little red gnome has a need to appear smart, clever, and funny. He is an inventor gnome, creating flying machines and demonstrating his skills to the other magic folk. He is hoping they will be impressed by his wisdom.

Lupine's fairy is a caretaker for an injured friend, keeping watch and comforting her in her pain. She wants to be in her "fancy dress" and likes to dance.

Yes, they write their storys and act out their inner gnome (or fairy) through this simple, undirected play.

A Homemade Fairy House.

DSC_1196

DSC_1157

Lupine has been playing daily with a set of wooden peg people fairies that she painted (with a bit of help on the faces) and some flower fairies my mom gave her for the holidays. She declared that they needed a house. So we went out to the garage and dug through the basement until we found the supplies we needed to make a simple, open-ended doll house.

DSC_1174

DSC_1160

I used a scrap of dimensional lumber and sliced off the corners to make it more of a rough oval. I sanded down all of the edges, then Lupine (with her little hammer) attached some basket-making reeds as hoops over the top, secured with brads and tied at the crosses with yarn. (Willow or dogwood branches would work well too, through drilled holes but we used what we had on hand.)

DSC_1184

DSC_1171

With a silk draped over the top it makes a sweet etherial house for our flock of fairies.

I love showing the kids that we can create ourselves what ever it is that we want – food, clothing, and yes, even toys. This is my kind of play!

Knitting Déjà Vu.

As I have sat with my knitting during recent evening I keep having this eerie feeling that I've knit this before.

Oh. I guess that's because I have.

I cast off two projects this week for my little ones – slippers for Sage and a second bluebird had for Bluebird. And it turns out I've knit both of them before.

DSC_0960

DSC_0968

DSC_0956
Sage's slippers are the same pattern I used for Pete's Solstice Slippers. (Which, sifting through my archives it looks like I never shared with you! Oops. Found the post! It is over here. Here is a link to them on Ravelry if you are interested.) I sized down to the women's small since I didn't have a child-sized pattern. They are felted, so I could tweak the final size to fit him perfectly.

Sage's favorite colors are red and black. I had some grey and black in my stash, but this lack of color seemed a little too blah so I picked up a ball of deep red to use for the outer sole. I was vetoed, but he said, "Oh, Mama. If you want to do the inner sole and cuff in red for you that's fine with me." He's making concessions about color for his mama. How sweet/pitiful.

DSC_0973

DSC_0975

DSC_0977

Lupine's DejaBlue hat is her second hat of this pattern. Remember this? It is gone. Poof. No more. (Here is where I practice my positive attitude and free myself of blaming by not making a crack about any particular adult in our family who lost the original on a walk in November. See? I'm not even bringing it up.)

She requested a replacement to her lost bluebird hat because her kitty spy hat is a little too much for her these days. According to Lupine, "People say its cute all the time and they give me way too much attention." I'm not sure how a hat the color of her eyes with a beak protruding from her forehead won't garner the same attention, but I'm willing to give it a shot. We can always remove the eyes and beak if it's too cute to wear to the co-op. I cast off the hat before bed last night and we'll add the beak and eyes later this week.

Next up? Finishing Pete's sweater and casting on one for myself. (Not necessarially in that order. Not that I'm holding a grudge about the first bluebird hat or anything. Ehem.)

Mod Podge Valentine Lanterns

I usually don't post on Tuesday as it is our busiest day of the homeschooling week, but today I woke early – before the kids – and had a quick minute to pop over. The tutorial below is a repost from last Valentine's Day and was one of the more simple, accessible crafts I have shared (and therefore very popular).

So here it is for you again, in case you missed it or didn't get around to making them last season. We've made these for other seasons as well, so adapt the idea as you wish. Simply choose the appropriate paper colors and shapes for what every you fancy. You can also twist a wire around the neck to hang your lantern. A few along the front of your house or above a table is magical.

All right. I'm off and running. Have a great day, all!

~ Rachel

DSC_0195

Lupine and I made Love Lanterns today. Simply crafted with Mod Podge, tissue paper or kite paper, and an old glass jar. Oh, and glitter. There is always glitter happening over here.

DSC_0194 

Love Lantern Tutorial

1. Cut hearts and other shapes from kite paper. As an alternative you may tear or hole-punch paper shapes.

2. Spread Mod Podge over half of the jar. Place shapes on wet Mod Podge. Overlap is beautiful. Lupine wanted plenty of open space on our jar, but I love overlapping coverage.

3. Coat with a second layer to seal paper in. Sprinkle with glitter while still wet and dab on with your brush.

4. Allow to dry thoroughly.

DSC_0203

Happy Valentine's Day!

Edited: I've gotten lots of emails asking where we get our kite paper. We buy ours locally from an online Waldorf supply store, Paper Scissors Stone. Click on their "Paper" page and scroll down.

Repost: Valentine Heart Babies.

Matchbox babies are one of our favorite craft projects any time of year, but these wee ones are especially sweet for Valentine's Day. As you look ahead to your weekend, perhaps you'll find time to make some of these sweeties. This is a repost from last winter and since I have so many new readers I thought perhaps some of you had missed this sweetness.

P.S. If you insert a strong needle threaded with embroidery floss through the top and bottom of the box slider (not the bed) about 1/3 of the way down and tie the thread about twice as long as the box, you can make your drawer open as if by magic when you pull the string.

Love,
Rachel

~ * ~ * ~ * ~

We started a new tradition this morning: Jammie Craft. Smoothies, fruit, toast, scissors, glitter, and glue – all while we're still in our PJs. I know. It sounds like a disastrous mix. But it was wonderful!

With Valentine's day on the horizon we collectively came up with this project: Heart Babies.

DSC_0047

A simple (kid-friendly) tutorial follows:

DSC_0055

Supplies:

Wool Felt * Wooden beads * Acorn caps

Thread * Paper * Fabric scraps

Cotton or wool stuffing * Glue

Small match boxes * Glitter

Mod Podge * Paint brush * Needle *Scissors

DSC_0022

The Box Top: Cut a strip of paper and a strip of fabric as wide as your matchbox. Cut long enough to allow 2/3" overlap. Coat matchbox cover with Mod Podge and wrap with paper. (This will keep the matchbox printing from showing through the fabric). Secure overlap area with additional Mod Podge.

DSC_0024

Coat the papered matchbox with Mod Podge and wrap neatly with fabric. Trim edges as needed. Coat again with Mod Podge and apply glitter if desired.

DSC_0034

The Bed: Cut the fabric lining for your matchbox bed. To do so you can sacrifice one match box to make a pattern by slitting at the corners and pressing flat, or use or method and guesstimate. Notch out corners.

DSC_0031

Mod Podge the inside of the box and carefully press lining into place.

DSC_0037

Baby: Cut out two identical hearts suitably sized to fit into your matchbox. Select a head-sized bead. Check if the bead will fit in the box with the lid closed. If not, select a smaller head or don't sweat it and let the box stay partially open.

Beginning at the "neck" area of the heart (top/center), use a running stitch or a blanket stitch to sew hearts together. Stuff with a bit of cotton or wool before closing. Sew bead to heart as follows: Heart, bead, scrap of felt (to secure head). Sew the head to body securely with a few stitches and tie off. Cut thread.

DSC_0043

Select an acorn cap sized appropriately for your bead head. Coat top of head (including felt scrap) with a generous amount of glue and press acorn cap into place. Wipe off excess glue with a cotton swab or your fingertip.


 DSC_0058

After glue and Mod Podge has dried, tuck baby into bed.

Happy Valentine's Day!

DSC_0053


 Note: If you think these are lovely, please check back often. We're pretty crafty around here and have lots more sweetness to share. xo Rachel